Mastering RxJava: A Comprehensive Guide to Reactive Programming in Java
Many Java developers feel intimidated when they hear the term “RxJava” due to preconceived notions. I won’t claim that RxJava is very simple right from the start; it does have a learning curve. However, trust me, it’s worth every second you invest in learning it. In this article, I will break down Java’s Reactive Extensions (Rx) to make them more accessible and understandable.
There’s a common belief that as developers begin writing code in RxJava, everything shifts to a parallel mode, with numerous threads created, causing different parts of the code to run in separate threads. This can lead to a cognitive disconnect and make it challenging to visualize. This misconception often causes fear when working with RxJava. Most of the Java developers are more familiar with traditional coding methods and may feel a bit uneasy with the functional approach, which is one of the core focuses of RXJava.
First things first, RxJava is a tool for handling asynchronous code. However, by default, it operates synchronously, meaning it doesn’t automatically create separate threads for concurrent execution. To introduce concurrency and make it asynchronous, you must configure RxJava explicitly by using operators like subscribeOn and observeOn to specify when and where concurrency should occur. More on this in the later part of this blog.
Now, you might be wondering, “Why invest time in learning RxJava? Can’t we use traditional Java packages to handle asynchronous execution?” The short answer is yes, you can. However, the real question is, are you willing to deal with the complexities of callback hell, error handling, and thread management? RxJava isn’t a magical solution, but rather a well-crafted Java library designed to address these challenges and more.
Before we start digging into RXJava and its constructs, Let’s first understand the Imperative and functional programming paradigms.
1 Imperative programming :- Imperative programming focuses on describing a sequence of steps or commands for the computer to follow to achieve a specific task. It often relies on statements that change the program’s state or modify data directly. It emphasizes how to achieve a goal by specifying the exact steps to take.
import java.util.Arrays;
import java.util.List;

public class ImperativeExample {
    public static void main(String[] args) {
        List<Integer> numbers = Arrays.asList(1, 2, 3, 4, 5, 6, 7, 8, 9, 10);
        int sum = 0;
        for (int number : numbers) {
            if (number % 2 == 0) {
                sum += number;
            }
        }
        System.out.println("Sum of even numbers: " + sum);
    }
}
2 Functional programming :- Functional programming, on the other hand, focuses on expressing computations as the evaluation of mathematical functions. It emphasizes what should be done rather than how to do it. In functional programming, functions are first-class citizens, which means they can be assigned to variables, passed as arguments and returned as values.
import java.util.Arrays;
import java.util.List;

public class FunctionalExample {
    public static void main(String[] args) {
        List<Integer> numbers = Arrays.asList(1, 2, 3, 4, 5, 6, 7, 8, 9, 10);
        int sum = numbers.stream()
                .filter(number -> number % 2 == 0)
                .mapToInt(Integer::intValue)
                .sum();
        System.out.println("Sum of even numbers: " + sum);
    }
}
Now that you understand the difference between imperative and functional programming, you might wonder about reactive programming. Is it the same as functional programming? The answer is that they are not the same, but reactive programming strongly promotes functional programming. That’s why you often see that many of the constructs in reactive programming are written in a functional way.
In other words, functional programming revolves around independent functions that are immutable and consistently produce the same result for the same input. On the other hand, reactive programming focuses on asynchronous operations, treating the entire code as a sequence of events and listening to and reacting to those events. One is function-driven, and the other is event-driven. In practice, we combine both to make the coding easier and less error-prone.
Is imperative programming obsolete? No, ultimately, whatever we write and execute is translated into a sequence of operations, which is in essence, imperative. So, whether it’s functional or reactive or both, under the hood, everything becomes imperative when it comes to the hardware. While we can have an unlimited stream of objects, we have only limited hardware for processing them. Therefore, all this processing should be sequential and follow a specific order; in other words, it has to be imperative.
RxJava Deep Dive
In this section, let’s delve into RxJava in-depth and explore how it enables us to build a scalable and asynchronous system. I will break down this discussion into the following sections, allowing anyone looking for specific information to skip others and find precisely what you need
- Concurrency and Parallelism :- How RxJava handles multiple tasks concurrently, including parallel execution when applicable.
- Reactive Programming Principles :- Exploring observables, observers, and operators at the core of RxJava’s reactive approach.
- Specialized Observables :- In RxJava, you have specialized types of Observables called Single, Maybe, and Completable. They’re built for specific tasks, making your code easier to read and manage.
- Asynchronous Operations and Schedulers :- Dealing with non-blocking operations, such as network requests and file I/O, using RxJava observables.Understanding and effectively utilizing RxJava’s schedulers to manage thread execution and context.
- Flow Control and Backpressure Handling :- Techniques for controlling data flow and preventing overload when working with data streams.
- Error Handling :- Performing robust error management, including exception handling and error propagation in RxJava.
- RxJava Through the Ages: From 1.x to 3.x :- A chill run-through of how RxJava evolved. Each version refined what was already there and brought its own unique flair to the table.
Let’s review each point step by step. It might be a bit detailed, so if you’re interested in a specific topic, please click on the respective section heading above to navigate directly to it
1. Concurrency and Parallelism
People often use the terms “concurrency” and “parallelism” interchangeably, but there is a subtle distinction between them. Concurrency is handling multiple tasks at the same time but parallelism is executing those tasks at the same time.
For example, Imagine a call center with one customer service representative and he/she manages multiple customer inquiries at the same time. He/she might be on the phone with one customer while responding to emails or chat messages from others. However, he/she can only assist one customer at a time; this is referred to as concurrency. On the other hand, parallelism is like having an additional representative. In this scenario, while one person is handling calls, another can manage emails.

As mentioned earlier, by default, RxJava operates in a blocking manner, meaning that all operations are executed one after the other, and the executing thread can get stuck, especially during IO operations. However, RxJava provides a sophisticated way to handle concurrency and parallelism. It offers operators like subscribeOn and observeOn that allows you to specify the Schedulers on which operations should run. This enables efficient thread management and helps achieve concurrency, making your code non-blocking and responsive.
I would use the word non-blocking a bit carefully here. In the context of RxJava, it means that the calling thread is not blocked; instead, RxJava executes the IO operation on a different thread, allowing the main thread to continue with the next operation in the sequence. So, non-blocking refers to the fact that the calling thread remains unblocked. It’s worth noting that the separate thread handling the IO operation can still be blocked if needed.
While Java did introduce NIO libraries in Java 7 to perform IO operations without blocking any thread, RxJava takes a different approach. It doesn’t use these libraries and, as a result, doesn’t fully leverage the advantage of true non-blocking operations. Instead, RxJava has its own set of tools that make asynchronous programming simpler and more streamlined.
For now, we don’t need to dive deeper into Concurrency and Parallelism; we’ll cover those topics later in this blog. In summary, if you don’t see subscribeOn and observeOn in your RxJava chain, the entire chain runs sequentially. There is one special case to note: if you’re working with a parallel stream in your code, and the source you’re using is also a parallel stream, then the operations will run concurrently and in parallel. The level of parallelism is determined by the number of CPU cores available
2. Reactive Programming Principles
Now, let’s explore the important RxJava building blocks and how to use them effectively. Don’t worry; I’ll break it down step by step, and by the end of this section, you’ll feel comfortable writing RxJava code with confidence and a clear understanding.
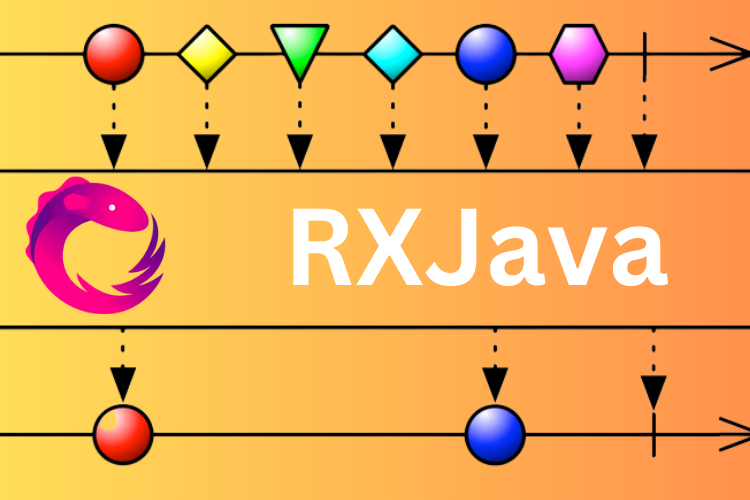
In RxJava, we deal with streams of data, where everything is treated as a continuous flow. We pay attention to and respond to each piece of data as it comes along in the stream. It’s like watching a river and reacting to each passing wave.
Fundamentally, the building blocks of RxJava can be classified into four main components: Observable , Observer , Operators and Schedulers . We will talk about the first three in this section and Schedulers we will cover them in the later part of this blog along with concurrency and multithreading.
In essence, an Observable serves as the source of a data or event stream, acting as the producer, while the Observer plays the role of the consumer, receiving and reacting to this data. Operators bridge the gap by transforming the raw data into the desired format required by the Observer.

If we Look at the example above, the car body on a conveyor belt represents the Observable. The conveyor belt continuously emits car bodies as they move along the assembly line. Think of the car body as a stream of events or data that we want to process further.
The tire-fixing machine and the painting machine act as Operators in our RxJava analogy. These machines are responsible for transforming or modifying the car bodies emitted by the conveyor belt Observable.
In this analogy, the container that carries the assembled car serves as the Observer. Without the presence of this container at the end of the assembly line, the conveyor belt comes to a halt, and further emissions cease. This highlights a crucial point in RxJava: the entire operation only takes place if someone or something is there to consume and collect the output.
Okay, enough gibber-gabber. Let’s begin with a real-world example and break it down to understand how it works. Let’s take an example of a burger machine which gives us the raw material to make the burger
import io.reactivex.rxjava3.core.Observable;
import io.reactivex.rxjava3.core.Observer;
import io.reactivex.rxjava3.disposables.Disposable;

public class BurgerMaker {
    public static void main(String[] args) {
        // Creating an Observable to represent the burger-making process
        Observable<String> burgerMachine = Observable.create(emitter -> {
            emitter.onNext("Bun");
            emitter.onNext("Lettuce");
            emitter.onNext("Tomato");
            emitter.onNext("Cheese");
            emitter.onNext("Patty");
            emitter.onNext("Ketchup");
            emitter.onNext("Bun");
            emitter.onComplete(); // Completion event
        });

        // Creating an Observer (Burger Chef)
        Observer<String> burgerChef = new Observer<String>() {
            @Override
            public void onSubscribe(Disposable d) {
                // runs only once, at the moment of subscription
                System.out.println("Let's make a burger");
            }

            @Override
            public void onNext(String ingredient) {
                // Handle each ingredient as it comes
                System.out.println("Adding " + ingredient);
            }

            @Override
            public void onError(Throwable e) {
                // Handle errors, if any
                System.err.println("Something went wrong: " + e.getMessage());
            }

            @Override
            public void onComplete() {
                // Burger is ready
                System.out.println("Burger is ready to serve!");
            }
        };

        /*Actual subscrioption happens here. without this burger machine itself will
        not start*/
        burgerMachine.subscribe(burgerChef);
    }
}
And the out put would look like below.
Let's make a burger
Adding Bun
Adding Lettuce
Adding Tomato
Adding Cheese
Adding Patty
Adding Ketchup
Adding Bun
Burger is ready to serve!

Process finished with exit code 0
In the above example, you can see how the burger machine emits each event and how the burger Chef consumes it. Just to clarify, the Observer must explicitly consume any event produced by the Observable. If the handling of an event is not specified, it will be missed even though the Observable emits it. Let’s go through each operation briefly.
onSubscribe: This event automatically occurs when an Observer starts observing the Observable. It happens only exactly once per subscription. If the Observer has a callback function written to handle this event, it will execute the corresponding action. In the above example we handle the event and print ‘Let’s make a burger‘. Observable passes Disposable object as a parameter, we can use this to unsubscribe from the stream either within the subscription logic or at a later point in our code by storing it as a global or accessible variable. This gives us the flexibility to manage our subscriptions and resources effectively based on our application’s requirements.
onNext: This method is called by the Observable to emit the next successful element. If the Observer has a corresponding function to handle it, that function gets called. In the above example, we print each ingredient as it comes. This event can be emitted zero or more times. This method accepts an object as a parameter, and the type of that parameter matches the type of the Observable. In the example, the Observable is of type String, so this method accepts a String-type argument.
onError: This method is invoked by the Observable to report errors. If the Observer has a corresponding function to handle it, that function is called. In the example above, we print ‘Something went wrong: ‘ followed by the error message. This event can occur either zero times or at most once, and it also marks the end of the Observable. The method accepts a Throwable as a parameter, allowing us to efficiently handle exceptions and log errors in a meaningful way.
For instance, in the example above, if the Observable had emitted an error like this
Observable<String> burgerMachine = Observable.create(emitter -> {
            emitter.onNext("Bun");
            emitter.onNext("Lettuce");
            emitter.onNext("Tomato");
            emitter.onNext("Cheese");
            emitter.onNext("Patty");
            emitter.onError(new RuntimeException("Machine power failure"));
            emitter.onNext("Ketchup");
            emitter.onNext("Bun");
            emitter.onComplete(); // Completion event
        });
the output would have looked like below.
Let's make a burger
Adding Bun
Adding Lettuce
Adding Tomato
Adding Cheese
Adding Patty
Something went wrong: Machine power failure

Process finished with exit code 0onComplete: This method is called by the Observable to signal the completion of the current stream. If the Observer has a corresponding function to handle it, and then that function is executed. In the example above, we print ‘Burger is ready to serve!’. This event can happen zero times or at most once, and it also marks the end of the Observable. Typically, this function is used to log the successful completion of a specific operation.
Either the onError or onComplete event happens in an Observable stream, but not both. When an error occurs, onError triggers and ends the Observable. For successful completion, onComplete triggers and also ends the Observable.
Now let’s look at the different kinds of Observables and Observers. This is just to create a mental map of observables and observers. Each of these will be revisited and explained deeply in the later parts of this blog
Different types of Observables
- Observable: The basic type of Observable that emits a sequence of items. It’s used for synchronous and asynchronous data sources.
- Flowable: A specialized Observable for handling potentially large streams of data or data sources that can produce data at a high rate. It provides backpressure support to handle situations where the consumer can’t keep up with the producer.
- Single: Represents a single value or an error. It’s used when you expect only one item to be emitted or an error to occur. Commonly used for network requests or database queries that return a single result.
- Maybe: Represents either a single item, no item at all, or an error. It’s used when the presence of an item is optional. Commonly used for optional configuration or settings.
- Completable: Represents a completion or error event without emitting any data. It’s used when you only care about the completion or failure of an operation, such as saving data to a database.
- Subject: A special type of Observable that can act as both an Observable and an Observer. Subjects can be used to multicast events to multiple subscribers and are often used in event bus implementations.
- BehaviorSubject: A type of Subject that emits the most recent item it has observed and all subsequent items to new subscribers.
- PublishSubject: A type of Subject that only emits items that are observed after the subscription.
- ReplaySubject: A type of Subject that stores all the events it’s ever processed. When a new subscriber comes along, it first gets a rundown of the archived events before getting the live updates. It’s set up to remember everything from the get-go, which could be risky if we’re dealing with a never-ending stream of events.
Different types of Observers
- Observer: The basic interface for observing emissions from an Observable. It has methods like onNext, onError, and onComplete for handling emissions, errors, and completion events.
- DisposableObserver: An extension of the Observer interface that includes a
disposemethod for explicit disposal of the subscription. It’s useful for managing and canceling subscriptions. - SingleObserver: An interface specifically designed for observing emissions from a
SingleObservable. It includes methods likeonSuccessandonErrorto handle the single value or error emitted by the Single. - MaybeObserver: An interface for observing emissions from a
MaybeObservable. It includes methods likeonSuccess,onComplete, andonErrorto handle one item, no item, or an error. - CompletableObserver: An interface for observing emissions from a
CompletableObservable. It includes methods likeonCompleteandonErrorto handle the completion or error event. - FlowableSubscriber: An interface for observing emissions from a
FlowableObservable, which is used for handling potentially large streams of data with backpressure support. It includes methods likeonNext,onError, andonComplete. - DisposableSubscriber: An extension of the FlowableSubscriber interface that includes a
disposemethod for explicit disposal of the subscription. - ResourceSubscriber: An extension of the DisposableSubscriber interface that provides additional resource management features for handling subscriptions.
Cold and Hot Observables
Ah, the world of Reactive Programming! In RxJava, the concepts of “Cold” and “Hot” Observables are pivotal. They help you manage how data streams are created and consumed, and understanding the distinction can make a big difference in how your application behaves.
Think of a Cold observable (Pull Model) like a movie on a streaming service. Every time you hit “Play,” the movie starts from the beginning, just for you. Similarly, a cold observable doesn’t start emitting items until an observer subscribes to it. Each subscriber gets its own independent set of emitted items. So if two observers subscribe to the same cold observable, the data stream starts anew for each.
import io.reactivex.Observable;

public class ColdObservableExample {
    public static void main(String[] args) {
        // Create a cold observable from a list of numbers
        Observable<Integer> numbersObservable = Observable.fromArray(1, 2, 3, 4, 5);

        // Subscribe multiple times to the same observable
        numbersObservable.subscribe(n -> System.out.println("Subscriber 1: " + n));
        numbersObservable.subscribe(n -> System.out.println("Subscriber 2: " + n));
    }
}
and the output would look like the below
Subscriber 1: 1
Subscriber 1: 2
Subscriber 1: 3
Subscriber 1: 4
Subscriber 1: 5
Subscriber 2: 1
Subscriber 2: 2
Subscriber 2: 3
Subscriber 2: 4
Subscriber 2: 5

Process finished with exit code 0
In the above example, each subscriber starts receiving their own set of items from the start as soon as they subscribe.
A Hot Observable is like a film rolling in a theater. The movie starts at a specific time and keeps playing, regardless of whether the theater is empty or packed. When you walk into the theater and the movie is already 20 minutes in, you’ve missed the first 20 minutes.
import io.reactivex.rxjava3.core.Observable;
import io.reactivex.rxjava3.observables.ConnectableObservable;
import io.reactivex.rxjava3.schedulers.Schedulers;

public class HotObservableExample {

  public static void main(String[] args) throws InterruptedException {
    ConnectableObservable<Object> movieTheater =
        Observable.create(
                emitter -> {
                  Thread.sleep(1000);
                  emitter.onNext(emitVals("Scene 1"));
                  Thread.sleep(1000);
                  emitter.onNext(emitVals("Scene 2"));
                  Thread.sleep(1000);
                  emitter.onNext(emitVals("Scene 3"));
                })
            .subscribeOn(Schedulers.io()) // do not want the main thread to be
            .publish();                  // for the emission

    // Viewer1 walks in
    movieTheater
        .subscribe(scene -> System.out.println("Viewer1: " + scene));

    // Start the movie
    movieTheater.connect();

    Thread.sleep(2000);
    // Viewer2 walks in during Scene 2
    movieTheater.subscribe(scene -> System.out.println("Viewer2: " + scene));

    Thread.sleep(1000);
    // Viewer3 walks in during Scene 3
    movieTheater.subscribe(scene -> System.out.println("Viewer3: " + scene));

    Thread.sleep(10000);
  }

  private static String emitVals(String val) {
    System.out.println("________" + val + "________");
    return val;
  }
}
and the output would look like the below
________Scene 1________
Viewer1: Scene 1
________Scene 2________
Viewer1: Scene 2
Viewer2: Scene 2
________Scene 3________
Viewer1: Scene 3
Viewer2: Scene 3
Viewer3: Scene 3

Process finished with exit code 0
The above code simulates the movie theater that I mentioned earlier, where the movie (scenes) plays continuously. New viewers (subscribers) only see scenes from the point they enter. So, Viewer1 sees all scenes, Viewer2 misses the first one, and Viewer3 only catches the last. All of this happens in real-time, making it a “hot” experience for the viewers.
Sensor data analysis, mouse click tracking, real-time stock price updates, and smartphone accelerometer readings are just a few practical examples of hot observables.
Operators
Operators are the bread and butter of reactive programming in Java. They help you manipulate and transform data streams, like turning dough into all sorts of pastries—some sweet, some savory. You’ve got operators to filter events, to merge multiple streams, to map one type of data to another, and so on. In short, they’re your toolkit for making the reactive magic happen! 😊
Alright, it’s time to dive into some key RxJava operators. I won’t cover every single one, as the list is quite extensive. However, I’ll highlight a handful of the most useful operators that you’ll likely use on a day-to-day basis.
map() This Operator in RxJava is like a little magician in your data pipeline. It takes each item from the source Observable, performs a transformation on it, and then emits the transformed item to the subscriber. Imagine having a conveyor belt of apples and you need them sliced; the map() operator is that super-efficient slicer making sure every apple that comes out is just how you want it—sliced to perfection! It’s incredibly handy when you want to modify the data in-flight before it reaches its final destination.
import io.reactivex.rxjava3.core.Observable;

public class MapExample {
    public static void main(String[] args) {
        Observable<String> fruitsObservable = Observable.just("Apple", "Banana", "Orange");

        fruitsObservable.map(fruit -> getColor(fruit))
                        .subscribe(color -> System.out.println("Received: " + color));
    }

    private static String getColor(String fruit) {
        switch (fruit) {
            case "Apple":
                return "Red";
            case "Banana":
                return "Yellow";
            case "Orange":
                return "Orange";
            default:
                return "Unknown";
        }
    }
}
and the output would look like the below
Received: Red
Received: Yellow
Received: Orange

Process finished with exit code 0flatMap()Unlike map(), which transforms one item into one other item, flatMap() can transform one item into multiple items, possibly even of a different type. The flatMap() operator in RxJava is your multitasking buddy, it can take one input and it can call multiple downstream services that too concurrently on different threads. The concurrency part we will cover later in this blog, for now, let’s look at the very common use cases where we use flatMap quite frequently. One such case is that where we call a function which itself is returning the observable. In that case, the map will not work as it will then output Observable<Observable<Object>>> rather than Observable<Object>.

For example
import io.reactivex.rxjava3.core.Observable;

public class FlatMapSingleObservableExample {
    public static void main(String[] args) {
        Observable<String> fruitsObservable = Observable.just("Apple", "Banana", "Orange");

        fruitsObservable.flatMap(fruit -> getColor(fruit))
                        .subscribe(color -> System.out.println("Received: " + color));
    }

    private static Observable<String> getColor(String fruit) {
        switch (fruit) {
            case "Apple":
                return Observable.just("Red");
            case "Banana":
                return Observable.just("Yellow");
            case "Orange":
                return Observable.just("Orange");
            default:
                return Observable.just("Unknown");
        }
    }
}
and the output would look like the below
Received: Red
Received: Yellow
Received: Orange

Process finished with exit code 0
Another example is, where it transforms one item into more than one elements
import io.reactivex.rxjava3.core.Observable;

public class FlatMapExample {
    public static void main(String[] args) {
        Observable<String> fruitsObservable = Observable.just("Apple", "Banana", "Orange");

        fruitsObservable.flatMap(fruit -> {
            String color = getColor(fruit);
            String taste = getTaste(fruit);
            return Observable.just(color, taste);
        }).subscribe(item -> System.out.println("Received: " + item));
    }

    private static String getColor(String fruit) {
        switch (fruit) {
            case "Apple":
                return "Red";
            case "Banana":
                return "Yellow";
            case "Orange":
                return "Orange";
            default:
                return "Unknown";
        }
    }

    private static String getTaste(String fruit) {
        switch (fruit) {
            case "Apple":
                return "Sweet";
            case "Banana":
                return "Mellow";
            case "Orange":
                return "Tangy";
            default:
                return "Unknown";
        }
    }
}
and the output would look like the below
Received: Red
Received: Sweet
Received: Yellow
Received: Mellow
Received: Orange
Received: Tangy

Process finished with exit code 0
Another example of flatMap is where the operator accepts there different functional parameters
< R > Observable < R > flatMap(
    Func1 < T, Observable < R >> onNext,
    Func1 < Throwable, Observable < R >> onError,
    Func0 < Observable < R >> onCompleted)
Let’s look at an example where these kinds of signature is helpful, In the following example, the focus is on signaling that the shop is closed after all the fruits have been sent out. We’re not concerned about the individual fruits, just the “Close the shop” event. But here the flatmap gives us a provision to process all the fruit events where we can also use multiple threads for concurrency and parallelism to expedite the process and at the same time send a “Close the shop” event right after processing the last fruit. Just to keep things simple, Multi-threaded fruit processing is not included here, more about that in the later part of this article.
import io.reactivex.rxjava3.core.Observable;

public class FlatMapExample {
    public static void main(String[] args) {
        Observable<String> observable = Observable.create(emitter -> {
            emitter.onNext("Apple");
            emitter.onNext("Banana");
            emitter.onNext("Orange");
            emitter.onComplete();
        });

        observable.flatMap(
                fruit -> Observable.empty(),  // onNext-- fruit processing end here
                throwable -> Observable.just("Close the shop"),  // onError
                () -> Observable.just("Close the shop")  // onCompleted
        ).subscribe(
                item -> System.out.println("Received: " + item),
                throwable -> System.out.println("Error: " + throwable),
                () -> System.out.println("Done!")
        );
    }
}
and the output would look like the below
Received: Close the shop
Done!

Process finished with exit code 0
Concurrency in flatMap() :- Due to flatMap creating individual observables for each item and running them in parallel, you might run into concurrency issues. In the following example, applying flatMap on a large list could overwhelm and crash the system. This could get even trickier if the inner observable is making calls to an external API.
Observable < Profile > profiles = Observable
    .from(veryLargeList)
    .flatMap(Fruit::prosess);
To tackle this problem, there exists an overloaded flatMap with an additional parameter maxConcurrency to control the concurrency, the signature would look like below
Observable < Profile > profiles = Observable
    .from(veryLargeList)
    .flatMap(Fruit::prosess,10);// maxConcurrency control parameter
concatMap() This operator is like a more organized version of flatMap(). It avoids any parallel execution and maintains the original order of events thus preventing any overlaps. flatMap() lacks a sense of order; it essentially relies on the merge() operator internally. This causes it to subscribe to all the inner observables simultaneously, without differentiating between them. In other words, the concatMap() is equivalent to flatMap() with maxConcurrency one.
Observable < Profile > profiles = Observable
    .just("Apple", "Banana", "Orange")
    .concatMap(Fruit::prosess);
The above code is equivalent to the below one
Observable < Profile > profiles = Observable
    .from(veryLargeList)
.flatMap(Fruit::prosess,1);// maxConcurrency =1 ie: no concurrencyflatMapIterable()This operator is very similar to flatMap(). However, as the name suggests, it works with iterables instead of single elements. This operator is useful when you have an Observable that emits lists. It takes an Observable of a list as input and emits an Observable for each item in that list.
import io.reactivex.rxjava3.core.Observable;

import java.util.Arrays;
import java.util.List;

public class FlatMapIterableExample {
  public static void main(String[] args) throws InterruptedException {
    Observable<List<String>> fruitBaskets =
        Observable.just(
            Arrays.asList("Apple", "Banana"), Arrays.asList("Mango", "Orange", "Papaya"));

    // With flatMapIterable
    fruitBaskets
        .flatMapIterable(basket -> basket)
        .subscribe(fruit -> System.out.println("Got fruit: " + fruit));
  }
}
and the output would look like below
Got fruit: Apple
Got fruit: Banana
Got fruit: Mango
Got fruit: Orange
Got fruit: Papaya

Process finished with exit code 0
In the above example, fruitBaskets is a stream of list of fruits and the flatMapIterable() flattens the Observable<List<String>> to stream of Observable<String> of each items in the lists. Now, if flatMapIterable() wasn’t there, you’d have to manually unpack each basket, likely using flatMap() and creating a new observable for each item like below
fruitBaskets.flatMap(basket -> Observable.fromIterable(basket))
              .subscribe(fruit -> System.out.println("Got fruit: " + fruit));
merge() and mergeWith()This operator is like a traffic cop at a busy intersection. Imagine you have multiple lanes (Observables) of cars (data items), each lane moving at its own pace. The merge() operator directs these cars into a single lane (a new Observable), maintaining the original speed and order of each incoming lane. In simple terms, it combines multiple Observables into one, emitting items as they arrive from any of the source Observables. It’s a great way to manage data from multiple sources without worrying about sequencing.
import io.reactivex.rxjava3.core.Observable;

public class MergeExample {
  public static void main(String[] args) throws InterruptedException {
    Observable<String> vendorA = Observable.just("Apple", "Orange");
    Observable<String> vendorB = Observable.just("Banana", "Grape");

    Observable<String> mergedFruits = Observable.merge(vendorA, vendorB);
    mergedFruits.subscribe(fruit -> System.out.println("Received: " + fruit));
  }
}
and the output would look like below
Received: Apple
Received: Orange
Received: Banana
Received: Grape

Process finished with exit code 0
The mergeWith() operator is basically a shorthand for using merge() when you already have one Observable and want to merge it with another. Instead of having to wrap both Observables in a merge() function, you can just use mergeWith() on one of the Observables and pass the other as an argument.
In the above code, you can rewrite it to use mergeWith() like below, which is the shorthand form of merge().
Observable<String> mergedFruits = vendorA.mergeWith(vendorB);When using merge(), if any of the merged Observables encounter an error, the merged Observable stream will also terminate immediately and call its onError() method. This means if you’re merging multiple Observables, and even just one fails, you won’t receive any more items from the other Observables.
import io.reactivex.rxjava3.core.Observable;

public class MergeExample {
  public static void main(String[] args) throws InterruptedException {
    Observable<String> vendorA = Observable.error(new RuntimeException("Oops, something went wrong!"));
    Observable<String> vendorB = Observable.just("Apple", "Orange");

    Observable<String> mergedFruits = Observable.merge(vendorA, vendorB);
    mergedFruits.subscribe(
            fruit -> System.out.println("Received: " + fruit),
            error -> System.out.println("Error: " + error.getMessage())
    );
  }
}
and the output would look like below
Error: Oops, something went wrong!

Process finished with exit code 0mergeDelayError()There is a way to delay any error notifications until all the Observables have completed their emissions during a merge operation. mergeDelayError() is a nifty operator that comes in handy when you want to merge multiple Observables but also want to ensure that all emissions are captured, even if one of the Observables throws an error.
import io.reactivex.rxjava3.core.Observable;

public class MergeDelayErrorExample {
  public static void main(String[] args) throws InterruptedException {
    Observable<String> vendorA = Observable.error(new RuntimeException("Oops, something went wrong!"));
    Observable<String> vendorB = Observable.just("Apple", "Orange");

    Observable<String> mergedFruits = Observable.mergeDelayError(vendorA, vendorB);
    mergedFruits.subscribe(
            fruit -> System.out.println("Received: " + fruit),
            error -> System.out.println("Error: " + error.getMessage())
    );
  }
}
Output
Received: Apple
Received: Orange
Error: Oops, something went wrong!

Process finished with exit code 0
There is an interesting thing to note here is that the error object. Since there is only one error the error message throws the exact same error

what if an error occurred in multiple streams, for example
import io.reactivex.rxjava3.core.Observable;

public class MergeDelayErrorExample {
  public static void main(String[] args) throws InterruptedException {
    Observable<String> vendorA = Observable.error(new RuntimeException("Oops, something went wrong!"));
    Observable<String> vendorB = Observable.just("Apple", "Orange");
    Observable<String> vendorC = Observable.error(new RuntimeException("Oops, something went wrong again!"));

    Observable<String> mergedFruits = Observable.mergeDelayError(vendorA, vendorB, vendorC);
    mergedFruits.subscribe(
            fruit -> System.out.println("Received: " + fruit),
            error -> System.out.println("Error: " + error.getMessage())
    );
  }
}
Output
Received: Apple
Received: Orange
Error: 2 exceptions occurred.

Process finished with exit code 0
The error message shows there are two exceptions that happened, and there is an additional field in the error object called Throwable.cause. and it has an array of exceptions that happened during the merge.

zip() and zipWith()They take emissions from multiple Observables and combine them based on a function you provide. In simple terms, zip() waits for each of the source Observables to emit an item and then applies a function to all those items, emitting the result.
Imagine you have three Observables in the context of a fruit market:
- One emits the types of fruits (
Apple, Banana, Orange, Cherry). - The second emits their corresponding prices (
$2, $1, $3, $4). - The third emits their availability status (
In stock, Out of stock, In stock, In stock).
You could use zip() to combine these three Observables so that each emitted tuple contains all the information you’d need for each type of fruit. For instance, the resulting Observable might emit tuples like:
("Apple", $2, "In stock")("Banana", $1, "Out of stock")("Orange", $3, "In stock")("Cherry", $4, "In stock")
So, for each type of fruit, you get its price and its availability status, all neatly packed into one data point. This is a perfect example of how zip() can offer a one-on-one mapping, correlating each fruit with its corresponding price and stock status.
Let’s check how it is done programmatically
import io.reactivex.rxjava3.core.Observable;

public class ZipExample {
  public static void main(String[] args) throws InterruptedException {
    // Observable for fruit types
    Observable<String> fruits = Observable.just("Apple", "Banana", "Orange", "Cherry");

    // Observable for fruit prices
    Observable<Integer> prices = Observable.just(2, 1, 3, 4);

    // Observable for availability
    Observable<String> availability =
        Observable.just("In stock", "Out of stock", "In stock", "In stock");

    // Using zip to combine these Observables
    Observable.zip(
            fruits,
            prices,
            availability,
            (fruit, price, avail) -> "(" + fruit + ", $" + price + ", " + avail + ")")
        .subscribe(
            zipped -> System.out.println("Zipped: " + zipped),
            throwable -> System.out.println("Error: " + throwable),
            () -> System.out.println("Done!"));
  }
}
Output
Zipped: (Apple, $2, In stock)
Zipped: (Banana, $1, Out of stock)
Zipped: (Orange, $3, In stock)
Zipped: (Cherry, $4, In stock)
Done!

Process finished with exit code 0
In the above example zip() waited for fruits, prices and availability to emit one element and perform the operation on emitted items (fruit, price, avail) -> "(" + fruit + ", $" + price + ", " + avail + ")").
In the zip operation the entire resultant stream gets terminated when one of the source streams gets completed, In the above example all the source streams emit exactly 4 elements, what if one of the streams gets terminated a bit early? For example, in the above code if the fruits Observable emits only 2 elements then the entire stream gets terminated once the fruits Observable finishes.
import io.reactivex.rxjava3.core.Observable;

public class ZipExample {
  public static void main(String[] args) throws InterruptedException {
    // Observable for fruit types
    Observable<String> fruits = Observable.just("Apple", "Banana", "Orange", "Cherry");

    // Observable for fruit prices
    Observable<Integer> prices = Observable.just(2, 1);

    // Observable for availability
    Observable<String> availability =
        Observable.just("In stock", "Out of stock", "In stock", "In stock");

    // Using zip to combine these Observables
    Observable.zip(
            fruits,
            prices,
            availability,
            (fruit, price, avail) -> "(" + fruit + ", $" + price + ", " + avail + ")")
        .subscribe(
            zipped -> System.out.println("Zipped: " + zipped),
            throwable -> System.out.println("Error: " + throwable),
            () -> System.out.println("Done!"));
  }
}
Output
Zipped: (Apple, $2, In stock)
Zipped: (Banana, $1, Out of stock)
Done!

Process finished with exit code 0zipWith() is just a shorthand form of zip() but at a time it can handle only two. So for handling three, it has to chain with one more, the above code can be rewritten to use zipWith() like below and it produces the exact same result.
fruits.zipWith(prices, (fruit, price) -> "(" + fruit + ", $" + price )
            .zipWith(availability,(fruitPrice,avail)-> fruitPrice+", "+avail+ ")")
        .subscribe(
            zipped -> System.out.println("Zipped: " + zipped),
            throwable -> System.out.println("Error: " + throwable),
() -> System.out.println("Done!"));combineLatest()In zip() the stream ends when one of the source Observables terminates, but combineLatest() wait for all the source observables to finish emission. In other words,It starts emitting items as soon as each of the source Observables has emitted at least one item. After that, whenever any source Observable emits a new item, combineLatest() combines the latest item from each Observable using the provided function and emits the result.
import io.reactivex.rxjava3.core.Observable;

public class CombineLatestExample {
  public static void main(String[] args) {
    // Observable for fruit types
    Observable<String> fruits =
        Observable.just("Apple", "Banana", "Cherry", "Orange")
            .concatMap(
                fruit ->
                    Observable.just(fruit).delay(100, java.util.concurrent.TimeUnit.MILLISECONDS));

    // Observable for fruit prices
    Observable<Integer> prices =
        Observable.just(2, 1)
            .concatMap(
                price ->
                    Observable.just(price).delay(150, java.util.concurrent.TimeUnit.MILLISECONDS));

    // Observable for fruit availability
    Observable<String> availability =
        Observable.just("In Stock", "Out of Stock", "In Stock", "Limited")
            .concatMap(
                avail ->
                    Observable.just(avail).delay(200, java.util.concurrent.TimeUnit.MILLISECONDS));

    // Using combineLatest to get the latest of each Observable
    Observable.combineLatest(
            fruits,
            prices,
            availability,
            (fruit, price, avail) ->
                "Fruit: " + fruit + ", Price: $" + price + ", Availability: " + avail)
        .subscribe(
            combined -> System.out.println("Combined: " + combined),
            throwable -> System.out.println("Error: " + throwable),
            () -> System.out.println("Done!"));

    // Sleep for a while to let the observables emit values
    try {
      Thread.sleep(1000);
    } catch (InterruptedException e) {
      e.printStackTrace();
    }
  }
}
Output
Combined: Fruit: Banana, Price: $2, Availability: In Stock
Combined: Fruit: Banana, Price: $1, Availability: In Stock
Combined: Fruit: Cherry, Price: $1, Availability: In Stock
Combined: Fruit: Orange, Price: $1, Availability: In Stock
Combined: Fruit: Orange, Price: $1, Availability: Out of Stock
Combined: Fruit: Orange, Price: $1, Availability: In Stock
Combined: Fruit: Orange, Price: $1, Availability: Limited
Done!

Process finished with exit code 0
In the above fruits emitted 4 times (“Apple”, “Banana”, “Cherry”, “Orange”), prices emitted 2 times(2,1) from the source observable, and availability emitted 4 times (“In Stock”, “Out of Stock”, “In Stock”, “Limited”) so total 10 emissions from source observables. But there were only 7 emissions that happened with combineLatest() why? Because the very initial emission requires all the source observables to emit at least one. So the firs emission happens after it receives one element from all the source observable. Since there were three observables, the final number of emissions matched up to 10 – 3, which is 7.
Note:- One thing to note here is the Thread.sleep(1000) at the end. Why do we need sleep to block the main thread here? Where are we delegating the operation to a different scheduler or thread here? By default the
delay()operators get executed on their own schedulers that is ComputationalThreadPool. So even without mentioning the schedulers explicitly here the work is being transferred to a different thread for its execution. It’s one of those things that makes RxJava powerful but also requires you to be aware of these default behaviors.
withLatestFrom()In combineLatest() it emits an item whenever any of the source observables emits but here there is a clear distinction between the two observables. It only emits when one of the source observables emits and it combines this value with the latest value of the other observable to perform the action mentioned in the transformation function.
import io.reactivex.rxjava3.core.Observable;

public class WithLatestFromExample {
  public static void main(String[] args) {
    Observable<String> fruitNames = Observable.just("Apple", "Banana", "Cherry");
    Observable<Integer> fruitPrices = Observable.just(1, 2, 3);
    fruitNames.withLatestFrom(fruitPrices, (name, price) -> "Fruit: " + name + ", Latest Price: $" + price)
            .subscribe(System.out::println);

  }
}
Output
Fruit: Apple, Latest Price: $3
Fruit: Banana, Latest Price: $3
Fruit: Cherry, Latest Price: $3

Process finished with exit code 0
In the above example, combineLatest() emits a value whenever the fruitNames Observable emits, using the latest values from the fruitPrices Observable at that specific time. By the time fruitNames emits its first element “Apple”, the fruitPrices Observable has already emitted its third element. That’s why you see only “3” from fruitPrices in the result.
stratWith()This operator in RxJava lets you prepend an initial item or sequence of items to an Observable. Basically, it makes sure your subscriber receives these items before it receives the items from the source Observable. Think of it like getting a free sample at a fruit market before you start shopping for fruits!
import io.reactivex.rxjava3.core.Observable;

public class StartWithExample {
  public static void main(String[] args) {
    Observable<String> fruits = Observable.just("Apple", "Banana", "Cherry");
    Observable<String> withInitialFruit = fruits.startWith( Observable.just("Grapes"));
    withInitialFruit.subscribe(fruit -> System.out.println("Received: " + fruit));
  }
}
Output
Received: Grapes
Received: Apple
Received: Banana
Received: Cherry

Process finished with exit code 0
Here the Grapes get printed before the actual emission happens.
Where do we use this? A use case could be in a UI where you want to display a list of fruits available in the inventory. You could use startWith() to insert a message like “Fetching available fruits…” before the actual list gets populated.
amb()This operator takes multiple Observables and subscribes to the one that emits an item first, ignoring the others. It’s like having multiple baskets of fruits in front of you but picking the one that first catches your eye and ignoring the rest.
import io.reactivex.rxjava3.core.Observable;

import java.util.List;

public class AmbExample {
  public static void main(String[] args) {
    // First Observable
    Observable<String> apples = Observable.just("Red Apple", "Green Apple")
            .delay(2, java.util.concurrent.TimeUnit.SECONDS);

    // Second Observable
    Observable<String> bananas = Observable.just("Yellow Banana")
            .delay(1, java.util.concurrent.TimeUnit.SECONDS);

    // Using amb() to pick the Observable that emits first

    Observable.amb(List.of(apples, bananas))
            .subscribe(
                    fruit -> System.out.println("Received: " + fruit),
                    throwable -> System.out.println("Error: " + throwable),
                    () -> System.out.println("Done!")
            );

    // Sleep to allow observables time to emit
    try {
      Thread.sleep(5000);
    } catch (InterruptedException e) {
      e.printStackTrace();
    }
  }
}
Output
Received: Yellow Banana
Done!

Process finished with exit code 0
In this example, bananas Observable emits first due to its shorter delay, so amb() will pick it, and you will only see “Yellow Banana” printed to the console. The apples Observable will be ignored.
we can also use ambArray() to avoid an explicit array declaration in the signature
Observable.ambArray(apples, bananas)
            .subscribe(
                    fruit -> System.out.println("Received: " + fruit),
                    throwable -> System.out.println("Error: " + throwable),
                    () -> System.out.println("Done!")
);scan()This operator is like a rolling accumulator. It’s really useful when you want to keep a running total or ongoing transformation of the data. The scan() operator takes an initial value and a function as parameters. This function is applied to each item emitted by the source Observable.
import io.reactivex.rxjava3.core.Observable;

public class ScanExample {
  public static void main(String[] args) {
    Observable<String> fruits = Observable.just("Apple", "Banana", "Apple", "Orange", "Banana", "Apple");

    fruits.scan(new StringBuilder(), (acc, fruit) -> acc.append(fruit).append(", "))
            .subscribe(System.out::println);
  }
}
Output
Apple,
Apple, Banana,
Apple, Banana, Apple,
Apple, Banana, Apple, Orange,
Apple, Banana, Apple, Orange, Banana,
Apple, Banana, Apple, Orange, Banana, Apple,

Process finished with exit code 0
In the code above, the accumulator (acc) is initialized with a new StringBuilder() during the first emission. For subsequent emissions, it carries over the previous result. The code also emits all intermediate results.
reduce()This operator is also similar to scan() but the only difference is that it emits only the final value. This can be considered as the
import io.reactivex.rxjava3.core.Observable;

public class ReduceExample {
  public static void main(String[] args) {
    Observable<String> fruits = Observable.just("Apple", "Banana", "Apple", "Orange", "Banana", "Apple");

    fruits.reduce(new StringBuilder(), (acc, fruit) -> acc.append(fruit).append(", "))
            .subscribe(System.out::println);
  }
}
Output
Apple, Banana, Apple, Orange, Banana, Apple,

Process finished with exit code 0
this is equivalent to
fruits.scan(new StringBuilder(), (acc, fruit) -> acc.append(fruit).append(", ")).takeLast(1)
            .subscribe(System.out::println);
if your sequence is infinite, scan() keeps emitting events for each upstream event, whereas reduce() will never emit any event. So due diligence needs to be taken when using these kinds of operations.
collect()This operator in RxJava is useful when you want to collect items from an Observable into a single mutable data structure. This is particularly handy if you need to transform an Observable stream into a collection like a list, set, or map. This is also similar to reduce() but more intuitive and has fewer lines of code.
import io.reactivex.rxjava3.core.Observable;
import io.reactivex.rxjava3.core.Single;
import java.util.ArrayList;
import java.util.List;

public class CollectExample {
  public static void main(String[] args) {
    Observable<String> fruitObservable = Observable.just("Apple", "Banana", "Orange", "Grapes");
    Single<List<String>> collectedFruits = fruitObservable.collect(ArrayList::new, List::add);

    collectedFruits.subscribe(
            result -> System.out.println("Collected Fruits: " + result),
            error -> System.err.println("Error: " + error)
    );
  }
}
Output
Collected Fruits: [Apple, Banana, Orange, Grapes]

Process finished with exit code 0
In this example, collect() starts with an empty ArrayList. As fruits are emitted from the fruitObservable, they are added to this list using the List::add method. Finally, when the Observable completes, a Single is emitted containing all the collected fruits.
Without collect(), you’d probably use subscribe() to collect these elements manually, complicating your code. So, collect() simplifies things quite a bit.
single()This operator is used when you expect the Observable to emit exactly one item. If the Observable emits more than one item, it will trigger an error. If it emits no items, it will also trigger an error.
import io.reactivex.rxjava3.core.Observable;
import io.reactivex.rxjava3.core.Single;

public class SingleExample {
  public static void main(String[] args) {
    // Example where Observable emits exactly one item
    Observable<String> singleFruit = Observable.just("Apple");
    Single<String> result = singleFruit.single("Default");
    result.subscribe(
        item -> System.out.println("Received: " + item),
        error -> System.err.println("Error: " + error));

    // Example where Observable emits more than one item (This will cause an error)
    Observable<String> multipleFruits = Observable.just("Apple", "Banana");
    Single<String> resultMultiple = multipleFruits.single("Default");
    resultMultiple.subscribe(
        item -> System.out.println("Received: " + item),
        error -> System.err.println("Error: " + error));

    // Example where Observable emits no items (This will take the default value)
    Observable<String> emptyFruits = Observable.empty();
    Single<String> resultEmpty = emptyFruits.single("Default");
    resultEmpty.subscribe(
        item -> System.out.println("Received: " + item),
        error -> System.err.println("Error: " + error));
  }
}
Output
Received: Apple
Received: Default
Error: java.lang.IllegalArgumentException: Sequence contains more than one element!

Process finished with exit code 0- In the first case, the Observable emits exactly one item “Apple”, and everything goes as expected.
- In the second case, the Observable emits more than one item, so an error will be triggered.
- In the third case, no items are emitted. The
single()operator will then take the default value specified (“Default”).
distinct()This operator filters out duplicate items based on their value, ensuring that only unique items are emitted downstream.
import io.reactivex.rxjava3.core.Observable;

public class DistinctExample {
  public static void main(String[] args) {
    Observable<String> fruits = Observable.just("Apple", "Banana", "Apple", "Orange", "Banana", "Cherry");

    fruits.distinct()
            .subscribe(fruit -> System.out.println("Received: " + fruit));
  }
}
Output
Received: Apple
Received: Banana
Received: Orange
Received: Cherry

Process finished with exit code 0
So, let’s say you have an Observable emitting a very large set of items, and a significant number of them are unique. In this scenario, the internal data structure used by distinct() to track unique items could grow large, consuming more memory. So due diligence needs to be taken when using these kinds of operations.
distinctUntilChanged()This operator is a sibling of distinct(), but with a more narrow focus. Instead of ensuring that all emitted items are unique throughout the entire observable chain, distinctUntilChanged() only suppresses consecutively duplicated items. In other words, it allows an item to be emitted if it’s different from the one immediately before it.
import io.reactivex.rxjava3.core.Observable;

public class DistinctUntilChangedExample {
  public static void main(String[] args) {
    Observable<String> fruits = Observable.just("Apple","Apple", "Banana", "Apple", "Orange", "Banana", "Cherry");

    fruits.distinctUntilChanged()
            .subscribe(fruit -> System.out.println("Received: " + fruit));
  }
}
Output
Received: Apple
Received: Banana
Received: Apple
Received: Orange
Received: Banana
Received: Cherry

Process finished with exit code 0
In the above example, Apple and Banana are repeating as it eliminates only the consecutive duplicates.
concat() and concatWith()This operator takes multiple observables and concatenates their emissions. It subscribes to the first observable, emits all its items, and once it’s complete, subscribes to the next observable, and so on.
import io.reactivex.rxjava3.core.Observable;

public class ConcatExample {
  public static void main(String[] args) {
    Observable<String> summerFruits = Observable.just("Mango", "Watermelon");
    Observable<String> winterFruits = Observable.just("Orange", "Apple");

    Observable.concat(summerFruits, winterFruits)
            .subscribe(fruit -> System.out.println("Received: " + fruit));
  }
}
Output
Received: Mango
Received: Watermelon
Received: Orange
Received: Apple

Process finished with exit code 0
The concatWith() operator is a simplified form of concat(). It concatenates the current observable with another observable. The above code can be rewritten to the following using concatWith() .
summerFruits.concatWith(winterFruits)
                    .subscribe(fruit -> System.out.println("Received: " + fruit));
Slicing and Dicing OperatorsFollowing are some of the operators used for slicing and dicing the emission.
Observable.range(1, 5).take(3); // [1, 2, 3]
Observable.range(1, 5).skip(3); // [4, 5]
Observable.range(1, 5).skip(5); // []
Observable.range(1, 5).takeLast(2); // [4, 5]
Observable.range(1, 5).skipLast(2); // [1, 2, 3]
Observable.range(1, 5).first(); // [1]
Observable.range(1, 5).last(); // [5]
Observable.range(1, 5).first(x -> x % 2 == 0); // [2]
Observable.range(1, 5).last(x -> x % 2 == 0); // [4]
Observable.range(1, 5).takeUntil(x -> x == 3); // [1, 2, 3]
Observable.range(1, 5).takeWhile(x -> x != 3); // [1, 2]Predicate OperatorsFollowing are some of the predicate operators used for emitting true/false based on the condition.
numbers.all(x -> x != 4);    // [false]
numbers.exists(x -> x == 4); // [true]
numbers.contains(4); // [true]switchOnNext()Operator is a bit unique; it’s used with an Observable that emits other Observables. When it receives a new Observable, it unsubscribes from the previous Observable and starts emitting items from the most recently emitted Observable.
To put it simply, it “switches” to the latest Observable.
Let’s imagine you have different fruit seasons, and each season has its own list of fruits. You could use switchOnNext() to only focus on the fruits of the current season.
import io.reactivex.rxjava3.core.Observable;
import java.util.concurrent.TimeUnit;

public class SwitchOnNextExample {
  public static void main(String[] args) {
    Observable<Observable<String>> seasonalFruits =
        Observable.create(
            emitter -> {
              Observable<String> summerFruits =
                  Observable.interval(1, TimeUnit.SECONDS)
                      .map(tick -> tick == 0 ? "Mango" : "Watermelon");
              Observable<String> winterFruits =
                  Observable.interval(1, TimeUnit.SECONDS)
                      .map(tick -> tick == 0 ? "Orange" : "Apple");

              emitter.onNext(summerFruits);
              try {
                Thread.sleep(3000);
              } catch (InterruptedException ignored) {
              }
              emitter.onNext(winterFruits);
            });

    Observable.switchOnNext(seasonalFruits)
        .subscribe(fruit -> System.out.println("Received: " + fruit));

    // Let it run for some time to see the output
    try {
      Thread.sleep(6000);
    } catch (InterruptedException ignored) {
    }
  }
}
In this example, the seasonalFruits observable emits two inner observables: summerFruits and winterFruits. The switchOnNext() operator unsubscribes from summerFruits and starts emitting from winterFruits as soon as winterFruits is emitted by seasonalFruits.
The output would look something like this:
Received: Mango
Received: Watermelon
Received: Watermelon
Received: Orange
Received: Apple
Received: Apple
Received: Apple
Received: Apple
Received: Apple

Process finished with exit code 0groupBy()This operator sorts the items emitted by an Observable into separate groups based on a specified key. Each group is itself an Observable that emits those items from the original Observable that share the same key.
Here’s an example using fruits, where we’ll categorize fruits by their color:
import io.reactivex.rxjava3.core.Observable;
import io.reactivex.rxjava3.observables.GroupedObservable;

public class GroupByExample {
  public static void main(String[] args) {
    Observable<String> fruits = Observable.just("Apple", "Banana", "Cherry", "Blueberry", "Orange");

    Observable<GroupedObservable<String, String>> groupedFruits =
        fruits.groupBy(fruit -> getColor(fruit));

    groupedFruits
        .flatMapSingle(group -> group.toList().map(fruitList -> group.getKey() + ": " + fruitList))
        .subscribe(
            result -> System.out.println("Received: " + result),
            error -> System.err.println("Error: " + error),
            () -> System.out.println("Done!"));
  }

  private static String getColor(String fruit) {
    switch (fruit) {
      case "Apple":
        return "Red";
      case "Banana":
        return "Yellow";
      case "Cherry":
        return "Red";
      case "Blueberry":
        return "Blue";
      case "Orange":
        return "Orange";
      default:
        return "Unknown";
    }
  }
}
Output:
Received: Red: [Apple, Cherry]
Received: Yellow: [Banana]
Received: Blue: [Blueberry]
Received: Orange: [Orange]
Done!

Process finished with exit code 0
In this example, groupBy() sorts fruits by their colors. Then you can use flatMapSingle() to go through each group and make a list of fruits that share the same color.
The result is a clear categorization of fruits by color, each as a separate emission from the Observable. Pretty handy for organizing data, don’t you think?
repeat()This operator is a convenient way to make an Observable emit its items multiple times. Essentially, when the source Observable completes, the repeat() operator will resubscribe to it, thus triggering a new set of emissions. This can be really useful when you need the same data set to be processed again and again.
Here’s an example using fruits, where we’ll repeat the emission 3 times
import io.reactivex.rxjava3.core.Observable;

public class RepeatExample {
  public static void main(String[] args) {
    Observable<String> fruits =
        Observable.just("Apple", "Banana", "Cherry", "Date").repeat(3); // Repeat 3 times

    fruits.subscribe(
        fruit -> System.out.println("Consuming: " + fruit),
        throwable -> System.out.println("Error: " + throwable),
        () -> System.out.println("Done!"));
  }
}
Output
Consuming: Apple
Consuming: Banana
Consuming: Cherry
Consuming: Date
Consuming: Apple
Consuming: Banana
Consuming: Cherry
Consuming: Date
Consuming: Apple
Consuming: Banana
Consuming: Cherry
Consuming: Date
Done!

Process finished with exit code 0compose()This operator in RxJava provides a way to apply some set of operators to an Observable in a reusable way. It’s particularly useful for encapsulating a sequence of transformations that you find yourself using repeatedly across different parts of your application. With compose(), you can define these sequences once and reuse them, making your code cleaner and more maintainable.
Let’s say we always need to filter out fruits that are not “Apple” or “Banana” and we want to convert each string to uppercase. We could encapsulate this logic using compose().
First, let’s create a reusable RxJava transformer:
import io.reactivex.rxjava3.core.Observable;
import io.reactivex.rxjava3.core.ObservableTransformer;

public class FruitTransformer implements ObservableTransformer<String, String> {
    @Override
    public Observable<String> apply(Observable<String> upstream) {
        return upstream.filter(fruit -> "Apple".equals(fruit) ||   "Banana".equals(fruit))
                       .map(String::toUpperCase);
    }
}
Now, let’s use this transformer in our main code:
import io.reactivex.rxjava3.core.Observable;

public class ComposeExample {
    public static void main(String[] args) {
        FruitTransformer transformer = new FruitTransformer();

        Observable<String> fruits = Observable.just("Apple", "Banana", "Cherry", "Date", "Elderberry");

        fruits.compose(transformer)
              .subscribe(
                  fruit -> System.out.println("Received: " + fruit),
                  throwable -> System.out.println("Error: " + throwable),
                  () -> System.out.println("Done!")
              );
    }
}
Output
Received: APPLE
Received: BANANA
Done!

Process finished with exit code 0
As you can see, only “Apple” and “Banana” made it through, and they’re in uppercase, just as our FruitTransformer specified. We’ve managed to encapsulate this sequence of transformations, making it easy to apply them wherever needed.
lift()This operator allows you to create a custom operator by acting directly on the Observer interface. With lift(), you can manipulate the events emitted by an Observable at a very low level, giving you greater control over the entire subscription process. However, lift() is less commonly used because for most purposes, higher-level operators like map(), filter(), etc., are sufficient and easier to understand.
Here’s a simple example that uses lift() to filter and transform a list of fruits. The custom operator will filter out any fruit that is not an “Apple” or “Banana” and will convert the remaining fruit names to uppercase as we have done in the previous example. In the previous example we used compose() which uses and groups a set of existing operators, where as lift() will allow you to define your own operator.
First, create a separate class for the custom operator:
import io.reactivex.rxjava3.core.ObservableOperator;
import io.reactivex.rxjava3.core.Observer;
import io.reactivex.rxjava3.disposables.Disposable;

public class FruitFilterAndTransformOperator implements ObservableOperator<String, String> {
    @Override
    public Observer<? super String> apply(Observer<? super String> observer) {
        return new Observer<String>() {
            @Override
            public void onNext(String fruit) {
                if ("Apple".equals(fruit) || "Banana".equals(fruit)) {
                    observer.onNext(fruit.toUpperCase());
                }
            }

            @Override
            public void onError(Throwable throwable) {
                observer.onError(throwable);
            }

            @Override
            public void onComplete() {
                observer.onComplete();
            }

            @Override
            public void onSubscribe(Disposable d) {
                observer.onSubscribe(d);
            }
        };
    }
}
Now, use this custom operator in your main program:
import io.reactivex.rxjava3.core.Observable;

public class LiftExample {
    public static void main(String[] args) {
        Observable<String> fruits = Observable.just("Apple", "Banana", "Cherry", "Date", "Elderberry");

        fruits.lift(new FruitFilterAndTransformOperator())
            .subscribe(
                fruit -> System.out.println("Received: " + fruit),
                throwable -> System.out.println("Error: " + throwable),
                () -> System.out.println("Done!")
            );
    }
}
Output
Received: APPLE
Received: BANANA
Done!

Process finished with exit code 0
3. Specialized Observables
In this section, we’re looking at a few types that are like Observables but a bit simpler for certain tasks. These are called Single, Maybe, and Completable. Even though these specialized types make some things easier to read and write, there’s really nothing they can do that you can’t also do with a regular Observable.
Even though these specialized types seem like a side dish to the main course that is Observable, they’re actually super useful. We see them pop up so often in RxJava that it’s worth taking some time to really get to know them. So, that’s what this section is all about.
Because these are just special types of Observables, they work in much the same way. To keep things short, we’ll only focus on what makes them different.
Single()It emits only a single value or an error. Unlike an Observable, which can emit zero or more items, a Single must emit one and only one item or an error. This makes Single ideal for operations that return a single result or throw an error, like network requests or database queries.
Creating a Single is also very similar to Observable
import io.reactivex.rxjava3.core.Single;

public class SingleCreationExample {
  public static void main(String[] args) {
    Single<String> appleSingle =
        Single.create(
            emitter -> {
              emitter.onSuccess("Apple");
            });
    Single<String> bananaSingle = Single.just("Banana");
    Single<String> cherrySingle =
        Single.fromCallable(
            () -> {
              // Some computation or I/O operation
              return "Cherry";
            });
    Single<String> errorSingle = Single.error(new Exception("Something went wrong"));

    appleSingle.subscribe(
        fruit -> {
          System.out.println("Received: " + fruit);
        },
        throwable -> {
          System.out.println("Error: " + throwable.getMessage());
        });

    bananaSingle.subscribe(
        fruit -> {
          System.out.println("Received: " + fruit);
        },
        throwable -> {
          System.out.println("Error: " + throwable.getMessage());
        });

    cherrySingle.subscribe(
        fruit -> {
          System.out.println("Received: " + fruit);
        },
        throwable -> {
          System.out.println("Error: " + throwable.getMessage());
        });
    errorSingle.subscribe(
        result -> System.out.println("Received: " + result),
        error -> System.out.println("Error: " + error.getMessage()));
  }
}
Output
Received: Apple
Received: Banana
Received: Cherry
Error: Something went wrong

Process finished with exit code 0
Single in RxJava is all about dealing with just one item. That’s why you won’t find any versions of just() that accept multiple values; it’s against what Single is designed for. When it comes to subscribing, Single also keeps it simple. You only need two callbacks—one for a successful value and the other for an error. There’s no need for an onComplete() method because getting a single value means you’re done.
Single doesn’t have a filter() function, unlike Observable. This is because filtering could make Single not emit anything, which would break its rules.
When do we use Single over Observable?
Use Single when you know an operation will end in just one result or an error. For example, if you’re fetching data from a server, it’ll either give you the data or an error, right? Single is lighter and quicker for these cases. If you don’t need a stream of multiple values, using Observable would be overdoing it.
Maybe()It represents a deferred computation that will either produce a single value, no value, or an error. This makes it useful for cases where the outcome can be one of these three states.
There are many occasions you would end up with an object of Maybe, Let’s look at some of them in the following example
import io.reactivex.rxjava3.core.Maybe;
import io.reactivex.rxjava3.core.Observable;
import io.reactivex.rxjava3.core.Single;

public class MaybeCreationExample {
  public static void main(String[] args) {
    // Using firstElement()
    Observable<String> fruits = Observable.just("Apple", "Banana", "Cherry");
    Maybe<String> firstFruit = fruits.firstElement();
    firstFruit.subscribe(
        fruit -> System.out.println("First Element: " + fruit),
        throwable -> System.out.println("First Element Error: " + throwable),
        () -> System.out.println("First Element Complete"));

    // Using lastElement()
    Maybe<String> lastFruit = fruits.lastElement();
    lastFruit.subscribe(
        fruit -> System.out.println("Last Element: " + fruit),
        throwable -> System.out.println("Last Element Error: " + throwable),
        () -> System.out.println("Last Element Complete"));

    // Using singleElement() (will throw error if there is more than one element)
    Maybe<String> singleFruit = Observable.just("Apple").singleElement();
    singleFruit.subscribe(
        fruit -> System.out.println("Single Element: " + fruit),
        throwable -> System.out.println("Single Element Error: " + throwable),
        () -> System.out.println("Single Element Complete"));

    // Additional Examples
    // Empty Maybe
    Maybe<String> emptyMaybe = Maybe.empty();
    emptyMaybe.subscribe(
        fruit -> System.out.println("Empty Maybe: " + fruit),
        throwable -> System.out.println("Empty Maybe Error: " + throwable),
        () -> System.out.println("Empty Maybe Complete"));

    // Maybe from Callable
    Maybe<String> callableMaybe = Maybe.fromCallable(() -> "Peach");
    callableMaybe.subscribe(
        fruit -> System.out.println("Callable Maybe: " + fruit),
        throwable -> System.out.println("Callable Maybe Error: " + throwable),
        () -> System.out.println("Callable Maybe Complete"));

    // Maybe from Single
    Maybe<String> fromSingle =
        Maybe.fromSingle(Single.create(emitter -> emitter.onSuccess("Grape")));
    fromSingle.subscribe(
        fruit -> System.out.println("From Single: " + fruit),
        throwable -> System.out.println("From Single Error: " + throwable),
        () -> System.out.println("From Single Complete"));
  }
}
Output
First Element: Apple
Last Element: Cherry
Single Element: Apple
Empty Maybe Complete
Callable Maybe: Peach
From Single: Grape

Process finished with exit code 0
There are some occasions where you might need to convert a Maybe to Single object, you should be careful while doing this as the Maybe might not emit any element at all which is a violation of Single and throws an error.
For example
import io.reactivex.rxjava3.core.Maybe;
import io.reactivex.rxjava3.core.Single;

public class MaybeToSingleExample {
  public static void main(String[] args) {
    Maybe<String> maybeEmpty = Maybe.empty();

    Single<String> singleFromMaybe = maybeEmpty.toSingle();

    singleFromMaybe.subscribe(
        item -> System.out.println("Received: " + item),
        error -> System.out.println("Error: " + error));
  }
}
Output
Error: java.util.NoSuchElementException: The MaybeSource is empty

Process finished with exit code 0
In this case, Maybe doesn’t emit anything that leads to an error thrown by toSingle(), You can provide a default value before converting it to a Single. This way, the Single still receives a value to emit, keeping things smooth and avoiding any hiccups.
import io.reactivex.rxjava3.core.Maybe;
import io.reactivex.rxjava3.core.Single;

public class MaybeToSingleWithDefaultExample {
  public static void main(String[] args) {
    Maybe<String> maybeEmpty = Maybe.empty();
    Single<String> singleFromMaybe = maybeEmpty.defaultIfEmpty("DefaultFruit");

    singleFromMaybe.subscribe(
        item -> System.out.println("Received: " + item),
        error -> System.out.println("Error: " + error));
  }
}
Output
Received: DefaultFruit

Process finished with exit code 0
You can provide a default value at any point in the chain of operations. Just keep in mind, if the Maybe doesn’t emit anything, it’ll skip all the steps until it finds that default value. Also, any operations you add after the Maybe should be fine with the possibility of no emission. For example, in the last example, the toSingle() method wasn’t cool with an empty Maybe, so we had to set a default value to keep things on track.
import io.reactivex.rxjava3.core.Maybe;

public class MaybeWithDefaultExample {
  public static void main(String[] args) {
    Maybe<String> maybeEmpty = Maybe.empty();

    maybeEmpty
        .map(fruit -> fruit.toUpperCase())
        .filter(fruit -> fruit.length() > 5)
        .defaultIfEmpty("DefaultFruit")
        .subscribe(
            item -> System.out.println("Received: " + item),
            error -> System.out.println("Error: " + error));
  }
}
Output
Received: DefaultFruit

Process finished with exit code 0
In the example, the map() and filter() steps were skipped because the Maybe was empty. It then got converted to a Single by adding a default value, and the chain of operations picked up from there again.
Completable() This variant is used when you have an Observable that you don’t care about the emitted value but only want to know whether the operation succeeded or failed. Think of it as an Observable without items but only with the completion or error notification. It’s useful for situations like database writes or file operations where the operation’s outcome (success or failure) is more important than any returned value.is makes it useful for cases where the outcome can be one of these three states.
For example, let’s say you’re saving a record to a database. With Completable, you’re just waiting to hear back if the save was successful or not. With Observable, you might be receiving a stream of records that are being saved one by one.
There are many ways we can create a Completable object, let’s explore some of them in the following example
import io.reactivex.rxjava3.core.Completable;
import io.reactivex.rxjava3.core.Observable;
import io.reactivex.rxjava3.core.Single;
import java.util.concurrent.CompletableFuture;

public class CompletableCreateExample {
  public static void main(String[] args) {
    // 1. Completable.create
    Completable.create(emitter -> emitter.onComplete())
        .subscribe(() -> System.out.println("Completable.create Done"));

    // 2. Completable.complete
    Completable.complete().subscribe(() -> System.out.println("Completable.complete Done"));

    // 3. Completable.error
    Completable.error(new Exception("An error occurred"))
        .subscribe(() -> {}, error -> System.out.println("Got error: " + error.getMessage()));

    // 4. Completable.defer
    Completable.defer(() -> Completable.complete())
        .subscribe(() -> System.out.println("Completable.defer Done"));

    // 5. Completable.fromAction
    Completable.fromAction(() -> System.out.println("From action"))
        .subscribe(() -> System.out.println("Completable.fromAction Done"));

    // 6. Completable.fromRunnable
    Completable.fromRunnable(() -> System.out.println("From runnable"))
        .subscribe(() -> System.out.println("Completable.fromRunnable Done"));

    // 7. Completable.fromFuture
    CompletableFuture<String> future = new CompletableFuture<>();
    // Create a Completable from the CompletableFuture
    Completable completable = Completable.fromFuture(future);
    future.complete("Some Value");
    // Subscribe to the Completable
    completable.subscribe(
        () -> System.out.println("Done"),
        throwable -> System.out.println("Error: " + throwable.getMessage()));
    // Complete the CompletableFuture

    // 8. Completable.fromObservable
    Completable.fromObservable(Observable.just("Apple", "Banana"))
        .subscribe(() -> System.out.println("Completable.fromObservable Done"));

    // 9. Completable.fromSingle
    Completable.fromSingle(Single.just("Apple"))
        .subscribe(() -> System.out.println("Completable.fromSingle Done"));

    // 10. Observable.ignoreElements (returns a Completable)
    Observable.just("Apple", "Banana")
        .ignoreElements()
        .subscribe(() -> System.out.println("Observable.ignoreElements Done"));

    // 11. Single.ignoreElement (returns a Completable)
    Single.just("Apple")
        .ignoreElement()
        .subscribe(() -> System.out.println("Single.ignoreElement Done"));
  }
}
Output
Completable.create Done
Completable.complete Done
Got error: An error occurred
Completable.defer Done
From action
Completable.fromAction Done
From runnable
Completable.fromRunnable Done
Done
Completable.fromObservable Done
Completable.fromSingle Done
Observable.ignoreElements Done
Single.ignoreElement Done
Like other variants, Completable also can be converted into Single and Observable. Just remember, since a Completable doesn’t spit out any data, you’ll probably need to provide a default value if you’re switching it to a Single. This way, you stick to the rules of what a Single expects.
import io.reactivex.rxjava3.core.Completable;
import io.reactivex.rxjava3.core.Observable;
import io.reactivex.rxjava3.core.Single;

public class CompletableConversionExample {
  public static void main(String[] args) {
    Completable completable = Completable.complete();

    // Convert to Single using toSingle()
    Single<String> single = completable.toSingle(() -> "Default Single Value");
    single.subscribe(
        value -> System.out.println("Single received: " + value),
        throwable -> System.out.println("Single error: " + throwable));

    // Convert to Single using toSingleDefault()
    Single<String> singleDefault = completable.toSingleDefault("Another Default Single Value");
    singleDefault.subscribe(
        value -> System.out.println("SingleDefault received: " + value),
        throwable -> System.out.println("SingleDefault error: " + throwable));

    // Convert to Observable using toObservable()
    Observable<String> observable = completable.toObservable();
    observable.subscribe(
        item -> System.out.println("Observable received item: " + item),
        throwable -> System.out.println("Observable error: " + throwable),
        () -> System.out.println("Observable done"));
  }
}
Output
Single received: Default Single Value
SingleDefault received: Another Default Single Value
Observable done

Process finished with exit code 0
When we talk about Completable we can’t ignore one important operator that is used quite frequently with Completable, that is the andThen() operator. This operator serves as a bridge to connect one Completable to another, or even to a Single, Maybe, or Observable. It allows you to specify what should happen right after the preceding Completable completes successfully.
Here’s the trick: the andThen() operator will only trigger its subsequent action if the prior Completable successfully completes without any error. If an error occurs at any step, the chain is broken, and the error is passed down to the Subscriber.
import io.reactivex.rxjava3.core.Completable;
import io.reactivex.rxjava3.core.Single;

public class AndThenExample {
  public static void main(String[] args) {

    // Create a Completable for peeling a banana
    Completable peelBanana = Completable.fromAction(() -> System.out.println("Banana is peeled"));

    // Create a Completable for cutting an apple
    Completable cutApple = Completable.fromAction(() -> System.out.println("Apple is cut"));

    // Create a Completable for squeezing an orange
    Completable squeezeOrange =
        Completable.fromAction(() -> System.out.println("Orange is squeezed"));

    // Create a Single that emits the name of the juice we made
    Single<String> juiceSingle = Single.fromCallable(() -> "Banana Apple Orange Juice");

    // Chain the Completables and Single using andThen
    peelBanana
        .andThen(cutApple)
        .andThen(squeezeOrange)
        .andThen(juiceSingle)
        .subscribe(
            juice -> System.out.println("Made juice: " + juice),
            error -> System.out.println("An error occurred: " + error.getMessage()));
  }
}
Output
Banana is peeled
Apple is cut
Orange is squeezed
Made juice: Banana Apple Orange Juice

Process finished with exit code 0
In the above example, you saw three Completable actions for peeling a banana, cutting an apple, and squeezing an orange. Using andThen(), we set it up so that the apple would only be cut after the banana was successfully peeled, and the orange would only be squeezed after the apple was successfully cut.
And guess what? You can even chain a Single at the end to emit a final result. It’s like saying, “After you’ve done all these things, tell me the name of the juice you made”.
So, in a nutshell, andThen() is your go-to operator when you want to sequence multiple Completables (or other types) in a specific order, ensuring each action only occurs after the successful completion of the one before it.
We’ve got a bunch of Observable variants out there, but we won’t dive into all of them in this blog post. Most of these specialized types work in a similar way, so understanding the ones we’ve covered should give you a good head start. We’ll get to some of the heavy hitters like Flowable in the later section of this blog, once we’ve laid down some groundwork.
4. Asynchronous Operations and Schedulers
Now, let’s discuss the asynchrony of RxJava. This is the section you might have been waiting for, where we’re going to explore how RxJava achieves non-blocking behavior and how it creates separate threads to delegate parts of code execution.
RxJava achieves this asynchrony with the help of Schedulers. Schedulers are very similar to ScheduledExecutorService from java.util.concurrent; they execute arbitrary blocks of code, potentially in the future.
In RxJava, asynchrony and multi-threading are primarily managed through Schedulers, along with the subscribeOn() and observeOn() operators. To make the code non-blocking, you can use these operators and pass different Schedulers to them. Without explicitly using subscribeOn() and observeOn(), the operations will generally be blocking. However, there are exceptions where certain operators like range(), delay(), and timer() implicitly run the code in a different thread.
Different types of Schedulers
- Schedulers.newThread() : This creates a new thread for each subscription. That is, each time an Observer subscribes to an Observable, a fresh thread is spawned to handle the computations or operations for that particular subscription.
This is often used for I/O-bound tasks or long-running computations that you don’t want to happen on the main thread. However, it’s worth noting that because a new thread is created every time, you could end up with a large number of threads if you have many subscriptions, potentially affecting performance.
Therefore, it’s generally advised to use this scheduler judiciously. - Schedulers.io() : This one is commonly used for I/O-bound work such as reading and writing files, database operations, or network calls. Unlike Schedulers.newThread(), it’s backed by an unbounded thread pool. This means it can reuse threads, which is more efficient than spawning a new thread for each task.
The Schedulers.io() is designed to be used for operations that are expected to be long-running and thus offloaded to separate threads to ensure they don’t block the main thread. However, since the thread pool is unbounded, you should still be careful about creating an excessive number of operations, as this could lead to resource exhaustion.
In a nutshell, Schedulers.io() is your go-to for tasks that are I/O-bound, but like anything that involves threading, it should be used judiciously. - Schedulers.computation(): This one is optimized for computational tasks, such as complex calculations and data processing. This scheduler is backed by a fixed-size thread pool that is set to the number of available processors.
The idea is to fully utilize the CPU while avoiding the overhead of creating too many threads. Because it’s fixed-size, you should avoid I/O-bound or long-running tasks on Schedulers.computation(), as they can starve the computational tasks for which the scheduler is intended. The tasks should be CPU-bound and quick to keep the CPU busy and make the most of parallel processing.
So, if you have a task that requires a lot of computation and you want to take advantage of multi-threading, Schedulers.computation() is generally the right choice. - Schedulers.from(Executor executor) : This allows you to create a custom scheduler backed by a specific Executor from Java’s standard library. This gives you control over thread management and task execution, letting you tailor the behavior to fit your application’s needs.
For example, if you have a custom thread pool configured with certain characteristics such as thread priority, keep-alive time, or queue types you can pass it into Schedulers.from() to create a scheduler that will utilize this thread pool for executing tasks.
By using Schedulers.from(Executor executor), you can align RxJava’s scheduling behavior with other parts of your application that also use the same Executor, achieving a consistent and optimized threading model. - Schedulers.immediate() : This scheduler runs tasks synchronously, in the same thread that initiated the task. This means that when you use Schedulers.immediate(), the operation will block the thread until the task is completed. It essentially behaves as if you’re not using any scheduler at all.
This scheduler is generally not recommended for IO-bound or CPU-intensive tasks, as it would block the calling thread and potentially make the application unresponsive. However, it can be useful for unit testing or for tasks that need to execute quickly and don’t require offloading to a separate thread. - Schedulers.trampoline() : This scheduler runs tasks on the current thread in a queued manner. Unlike Schedulers.immediate(), which executes tasks right away, Schedulers.trampoline() queues tasks and executes them one by one, FIFO (First-In-First-Out), on the thread that called the scheduler.
The Schedulers.trampoline() scheduler is ideal for tasks that are short-lived and can be run quickly in sequence. Because it runs tasks on the same thread that initiated the work, you should be cautious not to use it for long-running or IO-bound tasks, as that could block the thread.
So, if you have tasks that are not computationally expensive and you want them to execute in sequence, Schedulers.trampoline() can be a useful choice. - Schedulers.test() : This is used primarily for testing purposes. It provides a TestScheduler that allows you to control the timing of the emissions and actions in the sequence. This makes it easier to write unit tests for time-based operations, as you can programmatically advance the scheduler’s clock to simulate the passage of time.
By using Schedulers.test(), you can simulate delays, intervals, and other time-dependent operations without actually waiting for real-time delays. The TestScheduler comes with methods like advanceTimeBy and triggerActions that give you fine-grained control over the scheduler’s internal clock. This is extremely useful when you’re writing unit tests for asynchronous operations but you want to run them in a synchronous and deterministic manner for validation.
To sum it up, Schedulers.test() provides a way to manipulate time in unit tests, allowing for more controlled and deterministic tests.
You know, when you’re working with RxJava schedulers, you really don’t have to get lost in the weeds with the nitty-gritty details. Most of that stuff is tucked away so you can focus on what matters. But there’s one thing that’s worth mentioning: when RxJava needs to schedule a task, it searches for something called a “Worker.” You can think of a Worker like a thread from a thread pool, and the scheduler itself is like the pool holding all these threads. So, the Worker’s job is to actually get things done—schedule and execute the work. Makes sense, right?
What is the difference between subscribeOn() and observeOn()
The subscribeOn() method tells the source where to start, like which thread to use for emitting items. Once you set it, that’s it; you can’t change it later in the chain. So even if you use subscribeOn() more than once, only the first one actually does anything.
In simpler terms, subscribeOn() affects everything that comes before it in the RxJava chain. It doesn’t matter if you put it at the start or the end; the whole chain will be influenced by it.
for example
import io.reactivex.rxjava3.core.Observable;
import io.reactivex.rxjava3.schedulers.Schedulers;

public class SubscribeOnExample {
    public static void main(String[] args) {
        Observable<String> fruitObservable = Observable.create(emitter -> {
            System.out.println("Observable thread: " + Thread.currentThread().getName());
            emitter.onNext("Apple");
            emitter.onNext("Banana");
            emitter.onNext("Cherry");
            emitter.onComplete();
        });

        fruitObservable
                .subscribeOn(Schedulers.io())
                .map(fruit -> {
                    System.out.println("Mapping thread: " + Thread.currentThread().getName());
                    return fruit;
                })
                .subscribe(fruit -> {
                    System.out.println("Received: " + fruit + " on thread: " + Thread.currentThread().getName());
                });

        try {
            Thread.sleep(5000);
        } catch (InterruptedException e) {
            e.printStackTrace();
        }
    }
}
Output:
Observable thread: RxCachedThreadScheduler-1
Mapping thread: RxCachedThreadScheduler-1
Received: Apple on thread: RxCachedThreadScheduler-1
Mapping thread: RxCachedThreadScheduler-1
Received: Banana on thread: RxCachedThreadScheduler-1
Mapping thread: RxCachedThreadScheduler-1
Received: Cherry on thread: RxCachedThreadScheduler-1

Process finished with exit code 0
You might have noticed that there’s a Thread.sleep(5000) at the end of the code. That’s basically there to make sure the main thread hangs around long enough for the other thread to finish its job. Why? Because subscribeOn() sends the whole operation off to a different thread. That way, your main thread is free to do other stuff. But if the main thread finishes too quickly, your program will close before the other thread gets its work done. Hence, the sleep to keep the main thread waiting.
In simpler words, subscribeOn() assigns the work to a Schedulers.io() thread. This holds true no matter where you place subscribeOn() in the chain. For example, if you change its position, the effect stays the same.
fruitObservable
                .subscribeOn(Schedulers.io())
                .map(fruit -> {
                    System.out.println("Mapping thread: " + Thread.currentThread().getName());
                    return fruit.length() * fruit.length();
                })
                .subscribe(length -> {
                    System.out.println("Received: " + length + " on thread: " + Thread.currentThread().getName());
                });
Is equivalent to
fruitObservable
                .map(fruit -> {
                    System.out.println("Mapping thread: " + Thread.currentThread().getName());
                    return fruit.length() * fruit.length();
                })
                .subscribeOn(Schedulers.io())
                .subscribe(length -> {
                    System.out.println("Received: " + length + " on thread: " + Thread.currentThread().getName());
});observeOn() on the other hand, influences the thread that the operators and subscribers will work on downstream from where you place it. Unlike subscribeOn(), you can use observeOn() multiple times, and each will switch the thread for the subsequent operations.
For example
import io.reactivex.rxjava3.core.Observable;
import io.reactivex.rxjava3.schedulers.Schedulers;

public class ObserveOnExample {
    public static void main(String[] args) {
        Observable<String> fruitObservable = Observable.create(emitter -> {
            System.out.println("Observable thread: " + Thread.currentThread().getName());
            emitter.onNext("Apple");
            emitter.onNext("Banana");
            emitter.onNext("Cherry");
            emitter.onComplete();
        });

        fruitObservable
                .observeOn(Schedulers.io())
                .map(fruit -> {
                    System.out.println("Mapping thread: " + Thread.currentThread().getName());
                    return fruit;
                })
                .observeOn(Schedulers.computation())
                .subscribe(fruit -> {
                    System.out.println("Received: " + fruit + " on thread: " + Thread.currentThread().getName());
                });

        try {
            Thread.sleep(5000);
        } catch (InterruptedException e) {
            e.printStackTrace();
        }
    }
}
Output:
Observable thread: main
Mapping thread: RxCachedThreadScheduler-1
Mapping thread: RxCachedThreadScheduler-1
Mapping thread: RxCachedThreadScheduler-1
Received: Apple on thread: RxComputationThreadPool-1
Received: Banana on thread: RxComputationThreadPool-1
Received: Cherry on thread: RxComputationThreadPool-1

Process finished with exit code 0
In the example, whenever you spot observeOn(), know that everything after it will run on a different thread. So there were two observeOn() and there were two delegations, It’s like passing the baton in a relay race; the work gets handed off to another team member.
Now the question is what if we use both subscribeOn() and observeOn() together? Let’s find out with an example.
import io.reactivex.rxjava3.core.Observable;
import io.reactivex.rxjava3.schedulers.Schedulers;

public class SubscribeOnAndObserveOnExample {
    public static void main(String[] args) {
        Observable<String> fruitObservable = Observable.create(emitter -> {
            System.out.println("Observable thread: " +
                    Thread.currentThread().getName());
            emitter.onNext("Apple");
            emitter.onNext("Banana");
            emitter.onNext("Cherry");
            emitter.onComplete();
        });

        fruitObservable
                .map(fruit -> {
                    System.out.println("Mapping thread: " + Thread.currentThread().getName());
                    return fruit;
                })
                .observeOn(Schedulers.computation())
                .subscribeOn(Schedulers.io())
                .subscribe(fruit -> {
                    System.out.println("Received: " + fruit + " on thread: " + Thread.currentThread().getName());
                });

        try {
            Thread.sleep(5000);
        } catch (InterruptedException e) {
            e.printStackTrace();
        }
    }
}
Let’s analyze the output
Observable thread: main
Mapping thread: RxCachedThreadScheduler-1
Mapping thread: RxCachedThreadScheduler-1
Mapping thread: RxCachedThreadScheduler-1
Received: Apple on thread: RxComputationThreadPool-1
Received: Banana on thread: RxComputationThreadPool-1
Received: Cherry on thread: RxComputationThreadPool-1

Process finished with exit code 0
In the output, you’ll see that the ‘mapping‘ part happens on the Schedulers.io() thread, while the ‘subscription‘ part uses the Schedulers.computation() thread. Why is that? Well, subscribeOn() influences the whole chain and its placement doesn’t really matter. In our example, the chain starts executing on the Schedulers.io() thread because of subscribeOn(). It keeps running on this thread until it bumps into an observeOn() in the chain. At that point, the operation switches to the thread specified in observeOn(). So it’s like changing lanes; you start in one but can switch over when observeOn() tells you to.
So basically subscribeOn() decides what thread the whole operation starts on, especially good for heavy lifting stuff. Then observeOn() lets you change the thread as you go, usually so you can update the UI or tweak the data. Most of the time, you kick things off with subscribeOn() to get the hard work off the main thread, and then switch back with observeOn() when you’ve got to do something on the main thread.
Now let’s look how we can achieve parallelism using these schedulers and operators. As I mentioned in the early stage of this article, parallelism purely depends on the CPU, but for our purposes, think of it as doing multiple things at once. In other words, concurrency.
Imagine you have a bunch of fruit that needs cleaning, and you’ve got a cleaning unit to do it. If it takes 1 second to clean each fruit, doing them one by one will take a while. But if you clean multiple fruits at the same time, you’ll get the job done faster. That’s the idea behind parallelism: getting multiple things done at the same time to save overall time.
import io.reactivex.rxjava3.core.Observable;
import io.reactivex.rxjava3.schedulers.Schedulers;

import java.util.Date;

public class SequentialFruitcleaning {
    public static void main(String[] args) {
        Observable<String> fruitObservable = Observable.just("Apple", "Banana", "Cherry", "Date");

        fruitObservable
                .flatMap(fruit -> Observable.just(fruit)
                        .map(SequentialFruitcleaning::CleanFruit)
                )
                .observeOn(Schedulers.computation())
                .subscribe(result -> {
                    System.out.println("Processed: " + result + " on thread: " + Thread.currentThread().getName() + " time : "+ new Date());
                });

        try {
            Thread.sleep(10000); // Wait for all threads to complete their tasks
        } catch (InterruptedException e) {
            e.printStackTrace();
        }
    }

    private static String CleanFruit(String fruit) {
        try {
            Thread.sleep(1000);
        } catch (InterruptedException e) {
            e.printStackTrace();
        }
        System.out.println("Cleaning: " + fruit + " on thread: " + Thread.currentThread().getName() +  " time : "+ new Date());
        return fruit + " cleaned";
    }
}
Output:
Cleaning: Apple on thread: main time : Tue Jan 10 10:01:41 IST 2023
Processed: Apple cleaned on thread: RxComputationThreadPool-1 time : Tue Jan 10 10:01:41 IST 2023
Cleaning: Banana on thread: main time : Tue Jan 10 10:01:42 IST 2023
Processed: Banana cleaned on thread: RxComputationThreadPool-1 time : Tue Jan 10 10:01:42 IST 2023
Cleaning: Cherry on thread: main time : Tue Jan 10 10:01:43 IST 2023
Processed: Cherry cleaned on thread: RxComputationThreadPool-1 time : Tue Jan 10 10:01:43 IST 2023
Cleaning: Date on thread: main time : Tue Jan 10 10:01:44 IST 2023
Processed: Date cleaned on thread: RxComputationThreadPool-1 time : Tue Jan 10 10:01:44 IST 2023

Process finished with exit code 0
Here the process started at 10:01:41 and ended at 10:01:44, So it took 3 seconds for overall processing.
So what do we need to do to do it parallel, inside flatMap() we can use subscribeOn() to process each fruit as a separate Observable and delegate it to different threads. Let’s look at the following example and the time
import io.reactivex.rxjava3.core.Observable;
import io.reactivex.rxjava3.schedulers.Schedulers;

import java.util.Date;

public class ConcurrentFruitcleaning {
    public static void main(String[] args) {
        Observable<String> fruitObservable = Observable.just("Apple", "Banana", "Cherry", "Date");

        fruitObservable
                .flatMap(fruit -> Observable.just(fruit)
                .subscribeOn(Schedulers.io())
                .map(ConcurrentFruitcleaning::CleanFruit)
                )
                .observeOn(Schedulers.computation())
                .subscribe(result -> {
                    System.out.println("Processed: " + result + " on thread: " + Thread.currentThread().getName() + " time : "+ new Date());
                });

        try {
            Thread.sleep(10000); // Wait for all threads to complete their tasks
        } catch (InterruptedException e) {
            e.printStackTrace();
        }
    }

    private static String CleanFruit(String fruit) {
        try {
            Thread.sleep(1000);
        } catch (InterruptedException e) {
            e.printStackTrace();
        }
        System.out.println("Cleaning: " + fruit + " on thread: " + Thread.currentThread().getName() +  " time : "+ new Date());
        return fruit + " cleaned";
    }
}
Output:
Cleaning: Cherry on thread: RxCachedThreadScheduler-3 time : Tue Jan 10 10:09:06 IST 2023
Cleaning: Apple on thread: RxCachedThreadScheduler-1 time : Tue Jan 10 10:09:06 IST 2023
Cleaning: Date on thread: RxCachedThreadScheduler-4 time : Tue Jan 10 10:09:06 IST 2023
Cleaning: Banana on thread: RxCachedThreadScheduler-2 time : Tue Jan 10 10:09:06 IST 2023
Processed: Date cleaned on thread: RxComputationThreadPool-1 time : Tue Jan 10 10:09:06 IST 2023
Processed: Apple cleaned on thread: RxComputationThreadPool-1 time : Tue Jan 10 10:09:06 IST 2023
Processed: Banana cleaned on thread: RxComputationThreadPool-1 time : Tue Jan 10 10:09:06 IST 2023
Processed: Cherry cleaned on thread: RxComputationThreadPool-1 time : Tue Jan 10 10:09:06 IST 2023

Process finished with exit code 0
In the above example, the process started at 10:09:06 and ended at 10:09:06 . It took only a second to clean up all the fruits. This is the power of parallelism/concurrency. There are many ways to do this in RxJava such as operators like parallel(), runOn() etc but these are functions of ParallelFlowable. We will cover those in the later part of this article for now with pure Observable we use flatMap() in combination with Schedulers to achieve this.
Asynchronous Operators
Some RxJava operators like interval(), delay(), and timer() are built to run in the background by design. This way, they don’t hold up the rest of your code.
import io.reactivex.rxjava3.core.Observable;
import java.util.concurrent.TimeUnit;

public class AsyncOperatorsExample {
    public static void main(String[] args) {
        System.out.println("Start: Thread: " + Thread.currentThread().getName());
        // Interval: emits fruits at regular intervals
        Observable<String> intervalObservable = Observable.just("Apple", "Banana", "Cherry")
                .zipWith(Observable.interval(1, TimeUnit.SECONDS), (fruit, interval) -> fruit)
                .take(3); // take first 3 fruits

        // Timer: emits a single fruit after 3 seconds
        Observable<String> timerObservable = Observable.timer(3, TimeUnit.SECONDS)
                .map(i -> "Date");

        // Delay: delays all fruit emissions by 2 seconds
        Observable<String> delayObservable = Observable.just("Grape", "Lemon", "Orange")
                .delay(2, TimeUnit.SECONDS);

        // Subscribe to them
        intervalObservable.subscribe(item -> System.out.println("Interval: " + item + ", Thread: " + Thread.currentThread().getName()));
        timerObservable.subscribe(item -> System.out.println("Timer: " + item + ", Thread: " + Thread.currentThread().getName()));
        delayObservable.subscribe(item -> System.out.println("Delay: " + item + ", Thread: " + Thread.currentThread().getName()));
        // Keep main thread alive for some time
        try {
            Thread.sleep(10000);
        } catch (InterruptedException e) {
            e.printStackTrace();
        }
        System.out.println("End: Thread: " + Thread.currentThread().getName());
    }
}
Output
Start: Thread: main
Timeout: Peach, Thread: main
Timeout: Plum, Thread: main
Timeout: Mango, Thread: main
Interval: Apple, Thread: RxComputationThreadPool-1
Interval: Banana, Thread: RxComputationThreadPool-1
Delay: Grape, Thread: RxComputationThreadPool-3
Delay: Lemon, Thread: RxComputationThreadPool-3
Delay: Orange, Thread: RxComputationThreadPool-3
Interval: Cherry, Thread: RxComputationThreadPool-1
Timer: Date, Thread: RxComputationThreadPool-2
End: Thread: main

Process finished with exit code 0
All these operators are running on Schedulers.computation() thread, we can change the default scheduler by passing the Scheduler as an argument to the operator or use our conventional subscribeOn() or observeOn().
5. Flow Control And Backpressure Handling
In this section, we gonna talk about something related to the classic Producer-Consumer problem. The Producer-Consumer issue is all about timing and balance between two parties. One side, the Producer, is making stuff that could be anything like data or actual products. The other side, the Consumer, is using or ‘consuming’ what the producer makes. The big hiccup comes when the Producer is making things faster than the Consumer can handle.
Imagine you have a person (the Producer) who is peeling and slicing fruits to make juice. On the other side, you’ve got another person (the Consumer) who is taking those sliced fruits to make juice using a juicer.
Now, if the Producer starts slicing fruits way faster than the Consumer can juice them, you’d end up with a pile of sliced fruits that start to go bad. It becomes overwhelming for the Consumer to catch up.
So, how do we keep things balanced between the Producer and the Consumer? If you think about it, most people would probably come up with these three common-sense solutions.
- Discard the fruits if the Consumer can’t handle them (Flow control).
- Ask the Producer to slow down (Back Pressure).
- Speeding up the Consumer (Infrastructure Scale-UP).
Here we are going to discuss only the first two points as RxJava has nothing to do with the third point assuming that, we have introduced max concurrency and no of Consumers already. In simpler terms, the third point is just about adding more hardware to bring in more consumers and speed things up. So, it’s not really relevant to what we’re discussing here.
You’ve probably got a gist about Flow Control and Back Pressure. But let’s get one thing straight: we can only ask the Producer to slow down if we have control over it like a stream of Integer numbers created from our code. On the flip side, if the Producer is a sensor sending events to our app, there’s not much we can do to slow it down in our code. In that case, we can only control the flow within our code.
Now let’s go and explore how Flow control and Back Pressure are achieved in RxJava.
Flow Control
Flow control helps you manage the speed at which data moves from the producer to the consumer. An important thing that you should keep in mind is that, Flow control techniques will not control the speed of emission of producers, they will only control the speed of already emitted elements. It’s like putting a speed limit on a highway to prevent accidents.
You can use different techniques to either slow down the data or only pick what you need. In essence, it’s all about keeping things manageable by ignoring some items or bundling them together.
sample()As the name suggests, this operator will sample the entire emission and throttle down to a subset of the actual emission. In other words, it will take only one element in a specified time.
let’s consider an example where fruits are getting processed along a conveyor belt. Imagine you have a fruit factory where different fruits like apples, bananas, and cherries are coming through a conveyor belt at irregular intervals. You want to pick one fruit that arrives every second to quality-check it.
import io.reactivex.rxjava3.core.Observable;
import java.util.concurrent.TimeUnit;
public class SampleExample {
    public static void main(String[] args) throws InterruptedException {
        Observable<String> fruitObservable = Observable.create(emitter -> {
            emitter.onNext("Apple");
            Thread.sleep(300); // 300 ms
            emitter.onNext("Banana");
            Thread.sleep(500); // 500 ms
            emitter.onNext("Cherry");
            Thread.sleep(700); // 700 ms
            emitter.onNext("Date");
            Thread.sleep(400); // 400 ms
            emitter.onNext("Elderberry");
            emitter.onComplete();
        });

        fruitObservable
                .sample(1, TimeUnit.SECONDS) // Pick one fruit every second
                .subscribe(fruit -> System.out.println("Quality checking the fruit: " + fruit));
    }
}
Output
Quality checking the fruit: Cherry

Process finished with exit code 0
In the above example, ‘Apple‘, ‘Banana‘, and ‘Cherry‘—were emitted in the first second. Since we set the sample time to one second, only the last emission, which is ‘Cherry,’ gets selected. This is how the sampling works; it disregards all other elements and picks only the last one emitted.
You might be wondering why ‘Elderberry’ isn’t processed in the next second, even though it’s the last emission. The reason is that the observable completes before the second second is up. So, the timing isn’t in sync; the observable needs to still be active when the 2nd-second finishes.
Now, you might be thinking, “How can we include ‘Elderberry’?” Good news—there’s another version of the sample() method that takes an extra parameter called emitLast. This makes sure the final item from the source Observable gets emitted, even if it doesn’t align with the sampling window.
If you replace the sample operator code in the above example with the following code
fruitObservable
  .sample(1, TimeUnit.SECONDS,true)//true make sure the last element to be emitted
  .subscribe(fruit -> System.out.println("Quality checking the fruit: " + fruit));
then in the output, you can see the ‘Elderberry’ as well
Quality checking the fruit: Cherry
Quality checking the fruit: Elderberry

Process finished with exit code 0
If there’s no emission within a given time frame, sample() won’t emit anything either. For example, if no fruit is emitted between the 2nd and 3rd second in the example above, then sample() will simply stay quiet.
There is another important overloaded sample() function that accepts the observable as the argument.
import io.reactivex.rxjava3.core.Observable;
import java.util.concurrent.TimeUnit;
public class SampleWithObservableArgumentExample {
    public static void main(String[] args) throws InterruptedException {
        Observable<String> fruitObservable = Observable.create(emitter -> {
            String[] fruits = {"Apple", "Banana", "Cherry", "Date", "Elderberry"};
            for (String fruit : fruits) {
                emitter.onNext(fruit);
                Thread.sleep(600); // emitting each fruit every second
            }
            emitter.onComplete();
        });
        Observable<Long> triggerObservable = Observable.interval(1, TimeUnit.SECONDS);
        fruitObservable.sample(triggerObservable)
                .subscribe(fruit -> System.out.println("Received: " + fruit));
    }
}
Output
Received: Banana
Received: Date
Received: Elderberry

Process finished with exit code 0
In the example above, the sample method shows the most recent fruit from fruitObservable whenever triggerObservable lets out a new item. It doesn’t matter how often triggerObservable sends something; fruitObservable only updates when that happens.
        Observable<String> buttonClickObservable = Observable.create(emitter -> {
    // Logic to emit value when button is clicked
});
In the example, if we swap triggerObservable with buttonClickObservable, then fruitObservable will only show the latest fruit when someone presses the button.
throttleLast() and throttleFirst()These operators are kind of variants of sample(). In terms of functionality, throttleLast() is identical to the default sample() operator; there’s no difference. On the other hand, throttleFirst() works like sample() but emits the first element instead of the last.
throttleFirst() starts its 1-second window when an item pops out. For example, if an item appears at 800ms, the window goes from 800ms to 1800ms. The next window kicks off when another item comes out, like at 2100ms, running until 3100ms. So, the timing isn’t set in stone; it moves based on when items are emitted.
import io.reactivex.rxjava3.core.Observable;

import java.util.concurrent.TimeUnit;

public class ThrottleFirstExample {
  public static void main(String[] args) {
    Observable<String> fruitObservable =
        Observable.create(
            emitter -> {
              // Simulate some emissions
              emitter.onNext("Apple");
              Thread.sleep(500);
              emitter.onNext("Banana");// Emits at 500ms
              Thread.sleep(300);
              emitter.onNext("Cherry");// Emits at 800ms
              Thread.sleep(2000);
              emitter.onNext("Date");// Emits at 2 second and 800ms
                Thread.sleep(300);
                emitter.onNext("Blueberry");// Emits at 3 second and 100ms
              Thread.sleep(750);
              emitter.onNext("Elderberry");// Emits at 3 second and 850ms
              emitter.onComplete();
            });

    fruitObservable
        .throttleFirst(1, TimeUnit.SECONDS) // Throttle first item every 2 seconds
        .subscribe(
            fruit -> System.out.println("Received: " + fruit),
            throwable -> System.out.println("Error: " + throwable),
            () -> System.out.println("Done"));

    // Pause to let the Observable sequence finish
    try {
      Thread.sleep(5000);
    } catch (InterruptedException e) {
      e.printStackTrace();
    }
  }
}
Output
Received: Apple
Received: Date
Received: Elderberry
Done

Process finished with exit code 0
In the example, the first fruit “Apple” appears right at the start, kicking off a one-second window from 0 to 1 second. Both “Banana” and “Cherry” come in during that time, so they’re skipped. No fruits pop up between 1 and 2 seconds. Then “Date” appears at 2.8 seconds and starts a new one-second window that goes from 2.8 to 3.8 seconds. The “Blueberry” is still in this window, so it’s also skipped. Finally, “Elderberry” shows up at 3.85 seconds, just after the “Date” window has closed. It starts its own new one-second window from 3.85 to 4.85 seconds. So in essence, throttleFirst() makes each fruit wait its turn in its own one-second spotlight.
buffer()This operator lets you group elements into lists. Think of a string of single fruits like Apple, Banana, and Cherry. Using buffer, you can group them into lists like [Apple, Banana, Cherry], and then move on to the next bunch.
The buffering feature is really handy, especially when you want to cut down on API calls. Instead of sending one item at a time, you can just send a whole list. You also have the option to set a time frame for buffering, so you could collect every item that comes in within, say, 5 seconds.
What’s cool is that buffer isn’t one-size-fits-all; you can tweak it to fit your needs. You can set the list size, use time intervals, or even use another Observable to say when it’s time to release a buffer. It gives you room to manage your resources better and deal with your data in manageable bits.
import io.reactivex.rxjava3.core.Observable;

import java.util.concurrent.TimeUnit;

public class BufferExample {
  public static void main(String[] args) throws InterruptedException {
    Observable<String> fruitsObservable =
        Observable.just("Apple", "Banana", "Cherry", "Date", "Elderberry");

    // 1. Simple buffer: Collects 2 items and emit them as a list
    fruitsObservable.buffer(2).subscribe(list -> System.out.println("Buffer of 2: " + list));

    // 2. Time-based buffer: Collects items emitted in 1 second intervals
    Observable.interval(300, TimeUnit.MILLISECONDS)
        .map(i -> i + 1)
        .map(i -> "Fruit " + i)
        .buffer(1, TimeUnit.SECONDS)
        .subscribe(list -> System.out.println("Time-based buffer: " + list));

    // 3. Buffer until another Observable emits: Starts a new buffer whenever triggerObservable
    // emits
    Observable<Long> triggerObservable = Observable.interval(2, TimeUnit.SECONDS);
    Observable.interval(300, TimeUnit.MILLISECONDS)
        .map(i -> i + 1)
        .map(i -> "Fruit " + i)
        .buffer(triggerObservable)
        .subscribe(list -> System.out.println("Buffer with trigger: " + list));

    // Sleep to allow intervals to emit and buffers to collect
    Thread.sleep(5000);
  }
}
Output
Buffer of 2: [Apple, Banana]
Buffer of 2: [Cherry, Date]
Buffer of 2: [Elderberry]
Time-based buffer: [Fruit 1, Fruit 2, Fruit 3]
Time-based buffer: [Fruit 4, Fruit 5, Fruit 6]
Buffer with trigger: [Fruit 1, Fruit 2, Fruit 3, Fruit 4, Fruit 5, Fruit 6]
Time-based buffer: [Fruit 7, Fruit 8, Fruit 9]
Buffer with trigger: [Fruit 7, Fruit 8, Fruit 9, Fruit 10, Fruit 11, Fruit 12, Fruit 13]
Time-based buffer: [Fruit 10, Fruit 11, Fruit 12, Fruit 13]
Time-based buffer: [Fruit 14, Fruit 15, Fruit 16]

Process finished with exit code 0
In the above example, we used three types of buffer functions. Each one has its own way of collecting and sending out the fruits.
- Buffer with Count: It’s the most straightforward one of all, you set a number and it will collect that many items in a list before emitting. In the above example, the size of the buffer mentioned in the first buffer function is 2, which is why the output is [Apple, Banana], then [Cherry, Date], and lastly [Elderberry] as separate lists because there is only one fruit left when the Observable ends.
- Time-based Buffer: In the above example, the second buffer takes the time period as the argument. It collects fruits emitted in one-second intervals. So you have fruits emitting every 300ms, the buffer would collect all the fruits emitted within each one-second time window.
- Buffer with Trigger Observable: This starts a new buffer whenever a trigger Observable emits something. In the example, the triggerObservable emits every 2 seconds, so the buffer collects fruits for 2-second intervals before emitting them.
There is an interesting variant of count buffer, in some cases, you might want to collect items in a buffer but also skip some along the way. The buffer(3, 1) variant helps with this. It collects up to 3 fruits in a list but starts a new list after just one new fruit comes in. So you get overlapping sets like “Apple, Banana, Cherry” then “Banana, Cherry, Date” and so on. This way, you can manage how many old items you want to skip while creating a new list.
import io.reactivex.rxjava3.core.Observable;

public class BufferWithSkipExample {
  public static void main(String[] args) {
    Observable<String> fruitObservable =
        Observable.just("Apple", "Banana", "Cherry", "Date", "Elderberry");

    fruitObservable
        .buffer(3, 1)
        .subscribe(
            buffer -> System.out.println("Received: " + buffer),
            throwable -> System.out.println("Error: " + throwable),
            () -> System.out.println("Done"));
  }
}
Output
Received: [Apple, Banana, Cherry]
Received: [Banana, Cherry, Date]
Received: [Cherry, Date, Elderberry]
Received: [Date, Elderberry]
Received: [Elderberry]
Done

Process finished with exit code 0
If you set the ‘skip’ value larger than the ‘buffer size’, some items get left out and don’t make it into any buffer. It’s like you’re telling the system to jump ahead more steps than the size of the group you’re collecting, so you miss out on some items in between. This way, the buffered lists won’t contain every single item; some will be skipped, creating a kind of gap in the data you collect.
For example, let’s see what happens if you set the skip parameter to 4 in the previous example
fruitObservable
        .buffer(3, 4)
        .subscribe(
            buffer -> System.out.println("Received: " + buffer),
            throwable -> System.out.println("Error: " + throwable),
            () -> System.out.println("Done"));
Output
Received: [Apple, Banana, Cherry]
Received: [Elderberry]
Done

Process finished with exit code 0
The ‘Date’ is left out as it is out of buffer size 3 and it is well within the skip size 4.
window()This operator is like a more dynamic sibling to buffer(). Instead of batching items into lists, window() groups them into mini Observables. Each of these Observables emits items based on the conditions you set, like a count or time period. It’s a useful tool if you need more flexibility in how you deal with grouped data.
Using the window() function is often a better choice than buffer() because it’s more memory-efficient. While buffer() creates a new list each time it emits, which can be unpredictable for memory use, window() is smarter about it. It gives you an Observable of Observables, letting you handle each chunk of data as it comes, without storing it all in a list. So, if you’re concerned about keeping your app’s memory usage in check, go for window() wherever it is possible.
But other than this difference, window() and buffer() are pretty much the same and offer similar flexibility even when it comes to overloaded functions. Let’s look at the similarities of the overloaded functions
import io.reactivex.rxjava3.core.Observable;

import java.util.concurrent.TimeUnit;

public class WindowExample {
  public static void main(String[] args) throws InterruptedException {
    Observable<String> fruitsObservable =
        Observable.just("Apple", "Banana", "Cherry", "Date", "Elderberry");

    // 1. Simple buffer: Collects 2 items and emit them as a list
    fruitsObservable
        .window(2)
        .flatMap(unfold -> unfold)
        .subscribe(list -> System.out.println("Buffer of 2: " + list));

    // 2. Time-based buffer: Collects items emitted in 1 second intervals
    Observable.interval(300, TimeUnit.MILLISECONDS)
        .map(i -> i + 1)
        .map(i -> "Fruit " + i)
        .window(1, TimeUnit.SECONDS)
        .flatMap(unfold -> unfold)
        .subscribe(list -> System.out.println("Time-based buffer: " + list));

    // 3. Buffer until another Observable emits: Starts a new buffer whenever triggerObservable
    // emits
    Observable<Long> triggerObservable = Observable.interval(2, TimeUnit.SECONDS);
    Observable.interval(300, TimeUnit.MILLISECONDS)
        .map(i -> i + 1)
        .map(i -> "Fruit " + i)
        .window(triggerObservable)
        .flatMap(unfold -> unfold)
        .subscribe(list -> System.out.println("Buffer with trigger: " + list));

    // Sleep to allow intervals to emit and buffers to collect
    Thread.sleep(2000);
  }
}
Output
Buffer of 2: Apple
Buffer of 2: Banana
Buffer of 2: Cherry
Buffer of 2: Date
Buffer of 2: Elderberry
Time-based buffer: Fruit 1
Buffer with trigger: Fruit 1
Time-based buffer: Fruit 2
Buffer with trigger: Fruit 2
Buffer with trigger: Fruit 3
Time-based buffer: Fruit 3
Time-based buffer: Fruit 4
Buffer with trigger: Fruit 4
Time-based buffer: Fruit 5
Buffer with trigger: Fruit 5
Time-based buffer: Fruit 6
Buffer with trigger: Fruit 6

Process finished with exit code 0
If you look at the above example, we swapped out buffer() for window() and it worked almost the same. The key difference is that we added a flatMap() function. We need flatMap() because window() gives us Observables, not a list like in buffer(). So, flatMap() helps us unwrap those Observables into items we can work with.
debounce()This operator is your go-to if you’re dealing with a lot of quick, repetitive info coming in. Let’s say someone is typing into a search bar. You don’t want to be too hasty and call the API with every letter they punch in. So, what do you do? You use debounce to take a step back and wait for them to pause, maybe for about 300 milliseconds. This way, you’re more likely to get a full word or at least a more meaningful chunk of text. Basically, debounce helps you catch your breath and not jump the gun.
For example, you are setting debounce with 300ms you’re telling the Observable to take a breather. It’ll only let through the most recent item if there’s been a 300-millisecond gap with no new items. Think of it as waiting for a pause in the conversation to make your point. It cuts down on the chatter and helps you focus on what’s really important.
import io.reactivex.rxjava3.core.Observable;

import java.util.concurrent.TimeUnit;

public class Test {
  public static void main(String[] args) {

    // Create an Observable that emits fruits with different delays
    Observable<String> fruits =
        Observable.create(
            emitter -> {
              emitter.onNext("Apple");
              Thread.sleep(100); // Sleep for 100 ms
              emitter.onNext("Banana");
              Thread.sleep(1500); // Sleep for 1.5 seconds
              emitter.onNext("Cherry");
              Thread.sleep(200); // Sleep for 200 ms
              emitter.onNext("Date");
              emitter.onComplete();
            });

    // Apply the debounce operator
    fruits
        .debounce(1, TimeUnit.SECONDS)
        .subscribe(
            fruit -> System.out.println("Received: " + fruit),
            throwable -> System.out.println("Error: " + throwable),
            () -> System.out.println("Done"));

    // Wait for the Observable to complete
    try {
      Thread.sleep(5000);
    } catch (InterruptedException e) {
      e.printStackTrace();
    }
  }
}
Output
Received: Banana
Received: Date
Done

Process finished with exit code 0
In the above example ‘Banana’ and ‘Date’ both get their moments of fame here. ‘Banana’ is followed by a 1.5-second pause, and ‘Date’ sees a 1.3-second pause after it. Both meet the 1-second requirement set by the debounce() operator. The other fruits either appear too quickly one after another or don’t have a long enough quiet period after them, so they get skipped.
Starvation:- Oh, you’ve caught on to a tricky issue called ‘starvation’! So, let’s say our fruit stream is going crazy, right? It’s shooting out ‘Apple’, ‘Banana’, and ‘Cherry’ faster than you can blink, with no pause of 1 second between them. That means none of them would make the cut with our 1-second debounce rule. But we need some results from time to time, how do we tackle this problem?
To fix this, we can use timeout() operator and introduce a timeout in the observable if it does not emit an element for some time. But the problem here is that using a plain timeout() can be a deal-breaker because it disrupts the entire stream when it triggers. The neat thing here is you can keep using debounce(), but you give it a helping hand with timeout(). How? Well, instead of letting timeout() kill the stream, you make it past the latest fruit it sees. This way, if debounce() is being too strict and nothing’s getting through, timeout() says, “Hey, it’s been too quiet. Here’s the latest fruit I’ve got.” And then you continue as usual with your debounce() setup.
Alright, let’s focus on the function that makes this magic happen. It’s called timedDebounce (Recursive function). What this function does is pretty simple. It takes the original stream of fruits and adds both the debounce() and timeout() functionalities to it.
import io.reactivex.rxjava3.core.Observable;
import io.reactivex.rxjava3.observables.ConnectableObservable;
import java.util.concurrent.TimeUnit;

public class DebounceWithTimeoutExample {
  public static void main(String[] args) {
    ConnectableObservable<String> fruitObservable =
        Observable.<String>create(
                emitter -> {
                  emitter.onNext("Apple"); // Emitted at 0
                  Thread.sleep(900);
                  emitter.onNext("Banana"); // Emitted at 900
                  Thread.sleep(900);
                  emitter.onNext("Cherry"); // Emitted at 1800
                  Thread.sleep(200);
                  emitter.onNext("Date"); // Emitted at 2000
                  Thread.sleep(1200);
                  emitter.onNext("Elderberry"); // Emitted at  3200
                  Thread.sleep(900);
                  emitter.onNext("BlueBerry"); // 4100
                  Thread.sleep(900);
                  emitter.onNext("BlackBerry"); // 5000
                  emitter.onComplete();
                })
            .publish(); // Turn into a ConnectableObservable
    Observable<String> onTimeout =
        fruitObservable
            .take(1)
            .map(e -> " timeout emission : " + e)
            .concatWith(Observable.defer(() -> timedDebounce(fruitObservable)));
    fruitObservable
        .debounce(1000, TimeUnit.MILLISECONDS)
        .map(e -> "debounce emission : " + e)
        .timeout(1500, TimeUnit.MILLISECONDS, onTimeout)
        .subscribe(
            fruit -> System.out.println("Received: " + fruit),
            throwable -> System.out.println("Error: " + throwable),
            () -> System.out.println("Done"));

    fruitObservable.connect();
    // To keep the program running long enough for all events to fire
    try {
      Thread.sleep(10000);
    } catch (InterruptedException e) {
      e.printStackTrace();
    }
  }

  private static Observable<String> timedDebounce(Observable<String> upstream) {
    Observable<String> onTimeout =
        upstream
            .take(1)
            .map(e -> " timeout emission " + e)
            .concatWith(Observable.defer(() -> timedDebounce(upstream)));

    return upstream
        .debounce(1000, TimeUnit.MILLISECONDS)
        .map(e -> "debounce emission : " + e)
        .timeout(1500, TimeUnit.MILLISECONDS, onTimeout);
  }
}
Output
Received:  timeout emission : Cherry
Received: debounce emission : Date
Received:  timeout emission BlackBerry
Done

Process finished with exit code 0
In the above example, we have a ConnectableObservable named fruitObservable that emits a series of fruits with varying time delays between them. We are using the debounce() operator, which allows an item to be emitted only if a specified time (1 second in this case) has passed since the last item was emitted.
When the timeout() of 1.5 seconds is reached and no item has been emitted, the onTimeout observable takes over.
Now let’s break down the output:
Received: timeout emission : Cherry– ‘Cherry‘ was the first emitted fruit after the firsttimeoutoccurred, so the onTimeout observable kicks in and emits ‘Cherry’.Received: debounce emission : Date– After ‘Cherry’, ‘Date’ gets emitted with enough time (1.2 seconds) between it and the ‘Elderberry‘ satisfying the debounce condition.Received: timeout emission BlackBerry– Finally, ‘BlackBerry‘ is the last emitted fruit after anothertimeout()happens, so once again, the onTimeout observable takes over and emits ‘BlackBerry‘.
Backpressure
As we mentioned earlier, backpressure is all about controlling the emission from the producer. This will be possible only when we have control over the producer. Ok, let me start explaining with our regular fruit example. Imagine you’re at a party and you’re in charge of making smoothies. The fruit is coming in fast I mean, there’s a whole conveyor belt lined up with apples, bananas, and cherries, all heading your way. But you’ve only got one blender, and that thing isn’t a rocket ship.
It takes time to make a good smoothie, right? If you just let the fruit keep coming, you’re gonna be in trouble. Soon enough, you’ll have a mountain of fruit piling up next to the blender. Not only is it a waste, but it’s also going to make your blending process a mess.
So what is the solution then? Here comes a type of observable called Flawable. What if you could tell the conveyor belt, “Hey, slow down! I can only blend 10 fruits at a time!” That’s basically what Flowable does in RxJava. It’s a way for you to say, “Here’s how much I can handle—no more, no less.”
Let’s see a small example that shows how the Flowable control the emission by default.
import io.reactivex.rxjava3.core.Observable;
import io.reactivex.rxjava3.schedulers.Schedulers;

public class NoBackpressureExample {

  public static void main(String[] args) throws InterruptedException {
    Observable.range(1, 1000)
        .doOnNext(s -> System.out.println("Source pushed " + s))
        .observeOn(Schedulers.io())
        .doOnNext(i -> Thread.sleep(200))
        .subscribe(
            s -> System.out.println("Subscriber received " + s),
            Throwable::printStackTrace,
            () -> System.out.println("Done!"));
    Thread.sleep(20000);
  }
}
Output
Source pushed 1
Source pushed 2
Source pushed 3
..............
..............
..............
Source pushed 998
Source pushed 999
Source pushed 1000
Subscriber received 1
Subscriber received 2
Subscriber received 3
..............
..............
..............
Subscriber received 999
Subscriber received 1000
Now let’s swap the Observable with Flowable and check the difference in the output.
import io.reactivex.rxjava3.core.Flowable;
import io.reactivex.rxjava3.schedulers.Schedulers;

public class BackpressureExample {

  public static void main(String[] args) throws InterruptedException {
    Flowable.range(1, 1000)
        .doOnNext(s -> System.out.println("Source pushed " + s))
        .observeOn(Schedulers.io())
        .doOnNext(i -> Thread.sleep(200))
        .subscribe(
            s -> System.out.println("Subscriber received " + s),
            Throwable::printStackTrace,
            () -> System.out.println("Done!"));
    Thread.sleep(20000);
  }
}
Output
Source pushed 1
Source pushed 2
Source pushed 3
..............
..............
..............
Source pushed 126
Source pushed 127
Source pushed 128
Subscriber received 1
Subscriber received 2
Subscriber received 3
..............
..............
..............
Subscriber received 94
Subscriber received 95
Subscriber received 96
Source pushed 129
Source pushed 130
Source pushed 131
..............
..............
..............
Source pushed 223
Source pushed 224
Subscriber received 97
I get that the examples are a little lengthy, but breaking it down like this really helps to get the gist of backpressure. In the first example, we used an Observable to emit numbers. The Observable didn’t really care about the consumption rate; it just kept emitting elements. To help you understand the difference between Observable and Flowable, I added a 200ms delay. Thanks to this delay, the Observable had ample time to emit everything before even one item got consumed.
Flowable has built-in backpressure management that Observable lacks. It starts with an initial buffer of 128 items. It won’t emit more until 75% of that buffer, or 96 items, get consumed. Here’s the kicker: 32 items are still left in the buffer, so it only needs to add 96 more to refill the buffer. Initially, it emits 128 and thereafter, it emits in batches of 96.
Now, let’s shift our focus to the second example. Here, the key change is that we swapped out the Observable for a Flowable. And voila, things work differently. Emission halted after the first 128 items were emitted. Why? Because it was waiting for those items to be consumed. After 96 items, that is 75% of the buffer size were consumed, it resumed and spat out another 96 items before pausing again. Yeah, I know, the numbers can be puzzling, but that’s what makes backpressure fascinating.
You might be wondering why it waits for 75% of the buffer to be consumed instead of 100%. The idea is to make sure there’s a steady flow of items to the subscriber. By keeping a small reserve, the system ensures that the consumer doesn’t have to wait for the producer to catch up. It’s all about maintaining a smooth operation.
In RxJava 1, the backpressure mechanism was actually part of the Observable class. But with RxJava 2, things got shuffled around a bit. They moved this backpressure feature to a new class Flowable. The Good news is that nearly all the operators we’ve discussed in this article will work smoothly with Flowable too. Transitioning from Observable to Flowable is often just a one-liner code change. However, it’s worth noting that you should only opt for Flowable when you absolutely need the backpressure support, as it’s generally not as performant as Observable.
For consuming the Flowable, there is a new consumer called Subscriber. A Subscriber basically eats up what a Flowable dishes out, but with a twist. It can actually tell the Flowable to slow down or speed up. So, if a Subscriber is overwhelmed or underwhelmed, it can just say “Hey, give me ‘n’ items for now,” thanks to a method called request(n). This way, it’s in the driver’s seat, steering the flow of data just the way it likes.
Now, let’s explore how to customize backpressure in our own way. While you might not often need to do this in real-world scenarios, there are some exceptional cases where it could be useful.
import io.reactivex.rxjava3.core.Flowable;
import io.reactivex.rxjava3.schedulers.Schedulers;
import org.reactivestreams.Subscriber;
import org.reactivestreams.Subscription;
import java.util.concurrent.atomic.AtomicInteger;

import static java.lang.Thread.sleep;

public class Test {
  public static void main(String[] args) throws InterruptedException {
    Flowable.range(1, 1000)
        .doOnNext(s -> System.out.println("Source pushed " + s))
        .observeOn(Schedulers.io())
        .subscribe(
            new Subscriber<Integer>() {
              Subscription subscription;
              AtomicInteger count = new AtomicInteger(0);

              @Override
              public void onSubscribe(Subscription subscription) {
                this.subscription = subscription;
                System.out.println("Requesting 40 items!");
                subscription.request(40);
              }

              @Override
              public void onNext(Integer s) {
                try {
                  sleep(50);
                } catch (InterruptedException e) {
                  throw new RuntimeException(e);
                }
                System.out.println("Subscriber received " + s);
                if (count.incrementAndGet() % 20 == 0 && count.get() >= 40) {
                  System.out.println("Requesting 20 more !");
                  subscription.request(20);
                }
              }

              @Override
              public void onError(Throwable e) {
                e.printStackTrace();
              }

              @Override
              public void onComplete() {
                System.out.println("Done!");
              }
            });
    sleep(20000);
  }
}
Output
Requesting 40 items!
Source pushed 1
Source pushed 2
Source pushed 3
...............
...............
Source pushed 127
Source pushed 128
Subscriber received 1
Subscriber received 2
...............
...............
Subscriber received 40
Requesting 20 more !
Subscriber received 41
...............
...............
Subscriber received 60
Requesting 20 more !
Subscriber received 61
...............
...............
Subscriber received 95
Subscriber received 96
Source pushed 129
Source pushed 130
Confused? Looking at the number of emissions and consumptions, it might seem like the numbers are not adding up. So let me help you here and explain what really happens inder the hood
In the code example you’re working with, two types of buffers are involved: the Flowable’s internal buffer and the buffer introduced by the observeOn(Schedulers.io()) operator. Both have a role to play in managing backpressure. The Flowable’s internal buffer typically has an initial size of 128 items.
When the Subscriber initially requests 40 items, the producer doesn’t halt at this number. Instead, it fills up the observeOn(Schedulers.io()) buffer with 128 items, which is the buffer’s default size. After the Subscriber consumes it’s initially requested 40 items, 88 items remain in the observeOn() buffer (because 128 minus 40 equals 88).
Now let’s talk about subsequent requests from the Subscriber. When the subscriber asks for another 20 items via its onNext() function, these items are released from the observeOn() buffer, reducing its contents to 68 items (88 minus 20). This cycle continues, and when the Subscriber consumes up to the 96th item, the Flowable’s internal buffer is triggered again. It has reached 75% of its capacity, prompting it to emit another batch of 128 items, filling itself back up.
So in summary, the observeOn() buffer initially gets filled with 128 items from the producer. It then adjusts based on the Subscriber’s consumption rate and requests for more items. Meanwhile, the Flowable’s internal buffer waits until it has space equivalent to 75% of its capacity, at which point it triggers another emission of 128 items. This synergy between the two buffers ensures a smooth flow of data between the producer and the consumer, effectively managing backpressure.
Even though almost all Flowable operators have backpressure, there are some outliers like create(), interval(), and timer() . For create(), the method accepts a parameter to specify the backpressure strategy explicitly, and for interval() and timer() we need to use these with onBackpressureXXX() operators.
import io.reactivex.rxjava3.core.Flowable;
import io.reactivex.rxjava3.schedulers.Schedulers;

import java.util.concurrent.TimeUnit;

public class FlowableIntervalErrorExample {
  public static void main(String[] args) throws InterruptedException {
    Flowable<Long> flowable =
        Flowable.interval(1, TimeUnit.MILLISECONDS) // Fast producer
            .observeOn(Schedulers.io()) // Slow consumer
            .doOnNext(
                item -> {
                  // Simulate slow item processing
                  Thread.sleep(100);
                });

    flowable.subscribe(
        item -> System.out.println("Received: " + item),
        error -> System.out.println("Error: " + error), // Should print MissingBackpressureException
        () -> System.out.println("Done"));

    // Keep the program running
    Thread.sleep(5000);
  }
}
Output
Received: 0
Received: 1
Error: io.reactivex.rxjava3.exceptions.MissingBackpressureException: Can't deliver value 128 due to lack of requests

Process finished with exit code 0
Let’s examine various backpressure strategies and the onBackpressureXXX()
- BUFFER: This strategy buffers all the items that the downstream can’t consume momentarily. Watch out though, because if your producer is too fast, you could run out of memory.
- DROP: This one’s pretty straightforward—it drops items that can’t be consumed, with no fuss. Be careful, as you could lose some data that you might actually need.
- LATEST: This keeps only the latest item, overwriting any previous ones that haven’t been consumed. Essentially, it ensures that the consumer always gets the freshest data when it’s ready for it.
- MISSING: Does nothing. Literally. This means it’s up to you to handle any backpressure issues. Use this when you’re certain that the flow will honor backpressure naturally or you will use the
onBackpressureXXX() - ERROR: This is the “panic button” strategy it’ll throw a MissingBackpressureException whenever it can’t handle the flow. This can help you realize you’ve got a backpressure problem, but it won’t solve it for you.
Flowable<Integer> sourceFlowable = Flowable.create(emitter -> {
  for (int i = 1; i <= 1000; i++) {
    emitter.onNext(i);
  }
  emitter.onComplete();
}, BackpressureStrategy.XXX);
in the above example, you can replace BackpressureStrategy.XXX with any of the following strategies. BackpressureStrategy.BUFFER, BackpressureStrategy.DROP, BackpressureStrategy.LATEST, BackpressureStrategy.MISSING and BackpressureStrategy.ERROR
You should keep in mind that these backpressure strategies and operators are not the same as traditional backpressure support. They don’t tell the producer to slow down. Instead, they offer different ways to handle a fast-producing source. So there is always a tradeoff in these techniques like missing items or the possibility of out-of-memory errors etc.
Now let’s look at the usage of onBackpressureXXX() operators. These are very similar to the backpressure strategies and do the same thing when we chain it with any other operators.
- onBackpressureBuffer(): Similar to the BackpressureStrategy.BUFFER strategy, this will buffer all items that can’t be consumed immediately. Be cautious, as it can lead to OutOfMemoryError.
- onBackpressureDrop(): Just like the BackpressureStrategy.DROP strategy, this will drop items if the downstream can’t consume them fast enough. You can also provide a callback function to handle the dropped items if you wish.
- onBackpressureLatest(): It keeps the latest and drops any previous items that weren’t consumed, much like the BackpressureStrategy.LATEST strategy.
import io.reactivex.rxjava3.core.*;
import io.reactivex.rxjava3.schedulers.Schedulers;
import java.util.concurrent.TimeUnit;

public class BackpressureOperatorsExample {
  public static void main(String[] args) {
    // Using onBackpressureBuffer with Flowable.interval
    Flowable.interval(10, TimeUnit.MILLISECONDS, Schedulers.computation())
            .onBackpressureBuffer()
            .observeOn(Schedulers.io(), false, 2)
            .subscribe(
                    item -> {
                      Thread.sleep(100);
                      System.out.println("Buffer: " + item);
                    },
                    throwable -> System.out.println("Buffer Error: " + throwable)
            );

    // Using onBackpressureDrop with Flowable.timer
    Flowable.timer(5, TimeUnit.SECONDS, Schedulers.computation())
            .onBackpressureDrop()
            .observeOn(Schedulers.io())
            .subscribe(
                    item -> System.out.println("Drop: " + item),
                    throwable -> System.out.println("Drop Error: " + throwable)
            );

    // Using onBackpressureLatest with Observable and toFlowable
    Observable.interval(10, TimeUnit.MILLISECONDS, Schedulers.computation())
            .toFlowable(BackpressureStrategy.MISSING)
            .onBackpressureLatest()
            .observeOn(Schedulers.io(), false, 2)
            .subscribe(
                    item -> {
                      Thread.sleep(100);
                      System.out.println("Latest: " + item);
                    },
                    throwable -> System.out.println("Latest Error: " + throwable)
            );

    // Give the program enough time to demonstrate all cases
    try {
      Thread.sleep(5000);
    } catch (InterruptedException e) {
      e.printStackTrace();
    }
  }
}
In the example provided, none of the streams have built-in backpressure support. The first two, Flowable.interval() and Flowable.timer(), are unique among Flowables in this regard. The third stream is actually an Observable converted into a Flowable, which also lacks inherent backpressure support. All of these streams require external mechanisms to manage backpressure as mentioned in the example.
At last, it’s time to spotlight the Flowable.generate() function. Many see it as the gold standard for creating a Flowable, coming in close behind Flowable.fromIterable(). What sets Flowable.generate() apart is its built-in support for backpressure. This means it’s designed to create a data source that respects the pace set by its consumers. It’s a clean and efficient way to manage your data flow.
import io.reactivex.rxjava3.core.Flowable;
import io.reactivex.rxjava3.schedulers.Schedulers;
import org.reactivestreams.Subscriber;
import org.reactivestreams.Subscription;

import java.util.concurrent.atomic.AtomicInteger;

public class FlowableGenerateExample {
    public static void main(String[] args) {
        Flowable<Integer> flowable = Flowable.generate(() -> 0, (state, emitter) -> {
            emitter.onNext(state); // Emit the current state
            if (state == 1000) {
                emitter.onComplete(); // Complete the flow if the state reaches 1000
            }
            return state + 1; // Increment the state for the next emission
        });

        flowable.observeOn(Schedulers.io())
                .subscribe(new Subscriber<Integer>() {
                    private Subscription subscription;
                    private AtomicInteger counter = new AtomicInteger(0);

                    @Override
                    public void onSubscribe(Subscription s) {
                        this.subscription = s;
                        s.request(10); // Initial request for 10 items
                    }

                    @Override
                    public void onNext(Integer integer) {
                        System.out.println("Received: " + integer);
                        counter.incrementAndGet();
                        if (counter.get() % 10 == 0) {
                            try {
                                Thread.sleep(1000); // Simulating a delay in the consumer
                            } catch (InterruptedException e) {
                                e.printStackTrace();
                            }
                            subscription.request(10); // Request the next 10 items
                        }
                    }

                    @Override
                    public void onError(Throwable t) {
                        t.printStackTrace();
                    }

                    @Override
                    public void onComplete() {
                        System.out.println("Done!");
                    }
                });
    }
}
In the above example, the Subscriber requests 10 items initially and then requests another 10 items each time it receives and processes 10 items. You’ll notice that I’ve also added a sleep function to simulate a delay in the consumer, allowing you to see how Flowable.generate() respects the backpressure strategy.
6. Error Handling
Dealing with errors in RxJava is a crucial part of making sure your app runs smoothly. Think of it this way: in the world of RxJava, errors are treated like any other data, ie: you can forget about the usual fuss between checked and unchecked exceptions you find in regular Java. Here, any type of exception checked or not, gets sent directly to the onError() method. It’s a sort of one-stop shop for handling errors when you’re working in a reactive stream. So, in the RxJava world, all exceptions are treated as if they’re unchecked.
Before we dive into exception handling in RxJava, let’s first look at an example where we haven’t handled the exception. We’ll see what happens in such a scenario.
import io.reactivex.rxjava3.core.*;

public class NoErrorHandlingExample {
  public static void main(String[] args) {
    Observable.create(
            emitter -> {
              emitter.onNext(10 / 5);
              emitter.onNext(10 / 2);
              // Emitting an error
              emitter.onNext(10 / 0);
              emitter.onNext(10 / -2);
            })
        .subscribe(System.out::println);
  }
}
Output
2
5
io.reactivex.rxjava3.exceptions.OnErrorNotImplementedException: The exception was not handled due to missing onError handler in the subscribe() method call. Further reading: https://github.com/ReactiveX/RxJava/wiki/Error-Handling | java.lang.ArithmeticException: / by zero
	at io.reactivex.rxjava3.internal.functions.Functions$OnErrorMissingConsumer.accept(Functions.java:717) ................
................
................
................

	Process finished with exit code 0
This will make you realize why you should never ignore errors. Without an error handler, the code crashes, and you won’t even know why. So, better safe than sorry, right? Always handle your errors. So let’s modify the above code and add a simple exception handling on its way
Some folks think wrapping their whole RxJava code in a try/catch will catch any errors like in the below code. But that’s not how it works.
import io.reactivex.rxjava3.core.*;

public class AgainNoErrorHandlingExample {
  public static void main(String[] args) {
    try {
      Observable.create(
              emitter -> {
                emitter.onNext(10 / 5);
                emitter.onNext(10 / 2);
                // Emitting an error
                emitter.onNext(10 / 0);
                emitter.onNext(10 / -2);
              })
          .subscribe(System.out::println);
    } catch (Exception e) {
      System.out.println("This does not catch any exception in the above chain");
    }
  }
}
this one also ends up with the same output as above.RxJava has its own ways of catching errors, and a simple try/catch won’t cut it. So, don’t make that mistake; use RxJava’s built-in methods instead
import io.reactivex.rxjava3.core.*;

public class ErrorHandlingExample {
  public static void main(String[] args) {
    Observable.create(
            emitter -> {
              emitter.onNext(10 / 5);
              emitter.onNext(10 / 2);
              // Emitting an error
              emitter.onNext(10 / 0);
              emitter.onNext(10 / -2);
            })
        .subscribe(
            System.out::println,
            e ->
                System.out.println(
                    "An error occurred while subscribing but we can handle it here and the error is : "
                        + e));
  }
}
Or we can add an explicit exception handling during the emission and send it explicitly using the onError() method. Even though both produce the same output, this is the recommended way to handle the exception as it is more readable and avoids confusion when the subscription is far below the origin of the exception.
import io.reactivex.rxjava3.core.*;

public class RecommendedErrorHandlingExample {
  public static void main(String[] args) {
    Observable.create(
            emitter -> {
              try {
                emitter.onNext(10 / 5);
                emitter.onNext(10 / 2);
                // Emitting an error
                emitter.onNext(10 / 0);
                emitter.onNext(10 / -2);
              } catch (Exception e) {
                emitter.onError(e);
              }
            })
        .subscribe(
            System.out::println,
            e ->
                System.out.println(
                    "An error occurred while subscribing but we can handle it here and the error is : "
                        + e));
  }
}
Output
2
5
An error occurred while subscribing but we can handle it here and the error is : java.lang.ArithmeticException: / by zero

Process finished with exit code 0
Above is a small example that shows error handling, but in the real world, you will come across lot many cases where we need different types of exception handling. In RxJava, the error-handling mechanisms are not just limited to the basic onError() callback. You’ve got a bunch of operators and techniques up your sleeve to deal with exceptions more elegantly. Let’s explore the options one by one
onErrorReturn() / onErrorReturnItem() This is the simplest form of exception handling, where you can provide an alternate value when an error occurs. It’s a way to gracefully handle exceptions by providing a fallback value. Let’s see how it works in the real world.
import io.reactivex.rxjava3.core.Observable;

public class OnErrorReturnExample {
    public static void main(String[] args) {
        Observable<String> fruitObservable = Observable.create(emitter -> {
            String[] fruits = {"Apple", "Orange", null, "Grape"};
            for (String fruit : fruits) {
                if (fruit != null) {
                    emitter.onNext(makeJuice(fruit));
                } else {
                    emitter.onError(new NullPointerException("Fruit is null, can't make juice"));
                }
            }
            emitter.onComplete();
        });

        fruitObservable
                .onErrorReturn(throwable -> "Plain Water")  // Fallback juice
                .subscribe(
                        juice -> System.out.println("Got: " + juice),
                        error -> System.out.println("Oops: " + error.getMessage()),
                        () -> System.out.println("Done with juice making")
                );
    }
    public static String makeJuice(String fruit) {
        return fruit.toUpperCase() + " Juice";
    }
}
Output
Got: APPLE Juice
Got: ORANGE Juice
Got: Plain Water
Done with juice making

Process finished with exit code 0
In the above program, we have a list of fruits like “Apple” and “Orange,” but we’ve also got a pesky ‘null‘ in there. If we try to juice that ‘null,’ the program would usually crash. But we’ve got a safety net onErrorReturn() that swaps in “Plain Water” if anything goes wrong. So instead of breaking, the program says “Oops: Fruit is null, can’t make juice,” it gives us plain water, and then tells us it’s “Done with juice making” without going forward with the next fruit “Grape“.
onErrorReturnItem() is a static or simpler version of onErrorReturn()
        fruitObservable
                .onErrorReturnItem("Plain Water")   // Fallback juice
                .subscribe(
                        juice -> System.out.println("Got: " + juice),
                        error -> System.out.println("Oops: " + error.getMessage()),
                        () -> System.out.println("Done with juice making")
                );
In onErrorReturnItem(), you only provide the item to return as a fallback, without the option to examine the error via a Throwable argument. On the other hand, onErrorReturn() allows you to take a Throwable as an argument and decide what item to return based on the error. You can even log the error if needed. So, in a nutshell, onErrorReturn() offers more dynamism, while onErrorReturnItem() is more fixed.
This is how it gracefully handles the error with some default value and terminates normally without proceeding with the operation. In the program above, you’ll notice we specifically check for a null value and intentionally send out an error message within the for-loop. But what happens if we skip checking for null and just try to make juice from every fruit that comes our way?
Observable<String> fruitObservable = Observable.create(emitter -> {
            String[] fruits = {"Apple", "Orange", null, "Grape"};
            for (String fruit : fruits) {
                    emitter.onNext(makeJuice(fruit));
            }
            emitter.onComplete();
        });
This also produces the same result, but it’s not the best way to go about it, as I touched on in the error handling intro. Why? Well, first off all, the code isn’t that easy to read. Secondly, it first tosses out an unhandled error at fruit.toUpperCase(), which only gets caught later by onErrorReturn(). Throwing exceptions isn’t ideal because it hampers performance and eats up more resources.
onResumeNext() / onResumeWith() In onErrorReturn(), an error is swapped out for a default value. But what if you want to switch to a different observable altogether when an error pops up? That is where the onResumeNext() / onResumeWith() comes into play. Let modify the above code a little bit and see how these operators work.
import io.reactivex.rxjava3.core.Observable;

public class OnErrorResumeNextExample {
    public static void main(String[] args) {
        Observable<String> fruitObservable = Observable.create(emitter -> {
            String[] fruits = {"Apple", "Orange", null, "Grape"};
            for (String fruit : fruits) {
                if (fruit != null) {
                    emitter.onNext(makeJuice(fruit));
                } else {
                    emitter.onError(new NullPointerException("Fruit is null, can't make juice"));
                }
            }
            emitter.onComplete();
        });

        fruitObservable
                .onErrorResumeNext(throwable ->Observable.just("Mango","Litchi"))  // Fallback juice
                .subscribe(
                        juice -> System.out.println("Got: " + juice),
                        error -> System.out.println("Oops: " + error.getMessage()),
                        () -> System.out.println("Done with juice making")
                );
    }
    public static String makeJuice(String fruit) {
        return fruit.toUpperCase() + " Juice";
    }
}
Output
Got: APPLE Juice
Got: ORANGE Juice
Got: Mango
Got: Litchi
Done with juice making

Process finished with exit code 0
In the above code, a null value comes up, onErrorResumeNext() takes over and starts emitting “Mango” and “Litchi.” This effectively replaces the original stream from the point where the error happened. Following this, the original stream gets closed, so no more items will come from it. The program then continues with the new stream, wrapping things up by saying it’s “Done with juice making” after going through all the elements in this new stream.
onResumeWith() is like the simpler cousin of onResumeNext(), similar to how onErrorReturnItem() relates to onErrorReturn(). It doesn’t take into account the type of error thrown; it just swaps it out for a static observable.
 fruitObservable
                .onErrorResumeWith( Observable.just("Mango","Litchi"))  // Fallback juice
                .subscribe(
                        juice -> System.out.println("Got: " + juice),
                        error -> System.out.println("Oops: " + error.getMessage()),
                        () -> System.out.println("Done with juice making")
);timeout()This operator is useful if you want to terminate an Observable that’s slow to emit an item. It’s particularly handy when you need to adhere to specific Service Level Agreements (SLAs) for both upstream and downstream calls to stay within bounds. Let’s explore the various overloaded versions of timeout() through some examples.
1Simple Timeout :- This is the most simplest form of timeout(). In the following example, we’re emitting a new fruit every 200 milliseconds. But here’s the kicker: we’ve set a timeout for just 100 milliseconds. Because of that, we’re definitely going to hit a timeout exception, since it’s taking longer than the allowed time to spit out those fruits.
import io.reactivex.rxjava3.core.Observable;

import java.util.concurrent.TimeUnit;

public class Test {
  public static void main(String[] args) {
    Observable<String> fruitObservable =
        Observable.create(
            emitter -> {
              emitter.onNext("Apple");
              Thread.sleep(200);
              emitter.onNext("Orange");
              Thread.sleep(200);
              emitter.onNext("Grape");
              emitter.onComplete();
            });

    fruitObservable
        .timeout(100, TimeUnit.MILLISECONDS)
        .subscribe(
            fruit -> System.out.println("Received: " + fruit),
            throwable -> System.out.println("Uh-oh, timeout!"));
  }
}
Output
Received: Apple
Uh-oh, timeout!

Process finished with exit code 02Timeout with Fallback :- This gives an option to switch to a fallback observable if any timeout error occurs. In the below example, if a timeout occurs, the observable will fall back to emitting “Banana”.
import io.reactivex.rxjava3.core.Observable;

import java.util.concurrent.TimeUnit;

public class Test {
  public static void main(String[] args) {
    Observable<String> fruitObservable =
        Observable.create(
            emitter -> {
              emitter.onNext("Apple");
              Thread.sleep(200);
              emitter.onNext("Orange");
              Thread.sleep(200);
              emitter.onNext("Grape");
              emitter.onComplete();
            });

    Observable<String> fallback = Observable.just("Banana");

    fruitObservable
        .timeout(100, TimeUnit.MILLISECONDS, fallback)
        .subscribe(
            fruit -> System.out.println("Got: " + fruit),
            throwable -> System.out.println("Timeout occurred"));
  }
}
Output
Got: Apple
Got: Banana

Process finished with exit code 0
3 Dynamic Timeout :- This will allow us to assign the timeout dynamically. In the example, If the fruit is an “Apple”, we’re a bit more patient and can wait for 200 milliseconds. For anything else, it’s the usual 100 milliseconds.
import io.reactivex.rxjava3.core.Observable;
import java.util.concurrent.TimeUnit;

public class Test {
  public static void main(String[] args) {
    Observable<String> fruitObservable =
        Observable.create(
            emitter -> {
              String[] fruits = {"Apple", "Orange", "Banana", "Grape"};
              for (String fruit : fruits) {
                // Simulating some delay in emitting items.
                Thread.sleep(200);
                emitter.onNext(fruit);
              }
              emitter.onComplete();
            });

    fruitObservable
        .timeout(
            fruit -> {
              if ("Apple".equals(fruit)) {
                return Observable.timer(300, TimeUnit.MILLISECONDS);
              }
              return Observable.timer(100, TimeUnit.MILLISECONDS);
            })
        .subscribe(
            fruit -> System.out.println("Got: " + fruit),
            throwable -> System.out.println("Timeout occurred"));
  }
}
Output
Got: Apple
Got: Orange
Timeout occurred

Process finished with exit code 0
While this article won’t cover all the overloaded versions of the timeout() function, each one is highly useful in different scenarios and is pretty self-explanatory. Feel free to explore them yourself; you’ll find they’re quite straightforward.
retry()This operator comes in handy when you want to re-subscribe to an Observable that’s thrown an error. This is crucial in real-world scenarios, like making downstream API calls, where you might want to recover from a temporary glitch and continue processing the data stream. There are several versions of retry(), each fine-tuned to accommodate different requirements.
1 Simple Retry :- This is the simplest form of retry, but it’s also risky because it retries indefinitely whenever an error occurs. Exercise caution when using this approach, or avoid it unless absolutely necessary.
import io.reactivex.rxjava3.core.Observable;

public class SimpleRetryExample {
  public static void main(String[] args) {
    Observable<String> fruits =
        Observable.create(
            emitter -> {
              emitter.onNext("Apple");
              emitter.onNext("Banana");
              emitter.onError(new RuntimeException("Oops!"));
            });

    fruits
        .retry()
        .subscribe(
            item -> System.out.println("Received: " + item),
            throwable -> System.out.println("Error: " + throwable.getMessage()));
  }
}
Output
Received: Apple
Received: Banana
Received: Apple
Received: Banana
...............
...............
Received: Apple
Received: Banana
Received: Apple
Received: Banana
Received: Apple
...............
...............
...............
2 Retry with count :- This lets us set a maximum limit on retries so it won’t keep trying indefinitely.
import io.reactivex.rxjava3.core.Observable;

public class RetryWithCountExample {
  public static void main(String[] args) {
    Observable<String> fruits =
        Observable.create(
            emitter -> {
              emitter.onNext("Apple");
              emitter.onNext("Banana");
              emitter.onError(new RuntimeException("Oops!"));
            });

    fruits
        .retry(2)
        .subscribe(
            item -> System.out.println("Received: " + item),
            throwable -> System.out.println("Error: " + throwable.getMessage()));
  }
}
Output
Received: Apple
Received: Banana
Received: Apple
Received: Banana
Received: Apple
Received: Banana
Error: Oops!

Process finished with exit code 0
It subscribes to the same observable twice before terminating.
3 Retry with condition :- This variant lets you set conditions for retrying, like the type of error and the maximum number of attempts. For instance, you might decide to retry only if a particular type of exception occurs and you haven’t reached a certain retry limit. It offers you greater freedom to customize your retry behavior according to your unique requirements.
import io.reactivex.rxjava3.core.Observable;

public class RetryWithConditionExample {
  public static void main(String[] args) {
    Observable.create(
            emitter -> {
              emitter.onNext("Apple");
              emitter.onNext("Banana");
              emitter.onError(new RuntimeException("Oops!"));
            })
        .retry(
            (count, throwable) -> {
              return (throwable instanceof RuntimeException) && count < 3;
            })
        .subscribe(
            item -> System.out.println("Received: " + item),
            throwable -> System.out.println("Error: " + throwable),
            () -> System.out.println("Done"));
  }
}
Output
Received: Apple
Received: Banana
Received: Apple
Received: Banana
Received: Apple
Received: Banana
Error: java.lang.RuntimeException: Oops!

Process finished with exit code 0
There are several other variations like retryUntil(), retryWhen(), and so on. Feel free to explore them yourself; they’re all pretty straightforward and not at all confusing.
7. RxJava Through the Ages: From 1.x to 3.x
RxJava 1: Just Getting the Feet Wet
RxJava 1 was the newbie on the block. It introduced the basics like Observable to handle asynchronous streams of data, but let’s be real—it was sort of limited. Error handling was a bit clumsy, and there were no special types for single values or optional data. It was like the bicycle stage; it gets you places but not super efficiently.
RxJava 2: The Awkward Teenage Phase
Then came RxJava 2, which was like the project hit puberty. Now aligned with the Reactive Streams spec, it brought some new guys into the gang, like Flowable for backpressure and special types like Single and Maybe. Flowable was the main and much-needed addition to the library that offloaded the backpressure mechanism from the Observable and made it easy to use. It was like upgrading from a bike to a motorbike; faster, but you’ve got to be more careful.
RxJava 3: All Grown Up and Slick
Enter RxJava 3, and it’s like the project got its college degree and a job. It made everything tidier and better suited for those using Java 8 and up. The API got revamped, and types like Observable got split into more specialized forms, further polishing what was already there. Also, some methods were renamed to be more intuitive. It’s like going from a motorbike to a sleek car; you’re in control, and it’s a smooth ride.
The journey of RxJava is much like a coming-of-age story. It started out simple, learned valuable lessons.
Alright, that wraps up our deep dive into the ever-evolving landscape of RxJava. Whether you’re just starting out or you’ve been in the game for a while, RxJava has a wide range of functionalities that can make your coding tasks easier. It’s grown immensely from its early days, and it’s fascinating to wonder what’s coming up next. Thanks for coming along for the ride, and looking forward to more coding adventures with you! Happy Coding!!!!
